
The Build Forms tab is where you:
- Create & lay out the structure of your form
- Add & use an existing industry form templates
- Add resources like:
- Setup report templates
For more information on what is available in the Build forms tab, please visit the Build forms support hub.
Toolbar
The toolbar is located on the left hand side of your build form screen and consists of the tools used for building your form. They enable you to ask the questions that allow you to populate your form.
There are different groups of tools: Containers are used to frame portions of a form, Input Tools are what is used to collect the information from the users. Actions are triggered events that process or cause activity on the forms. Media are special types of inputs used that is not textual, for example Audio or Sketches.
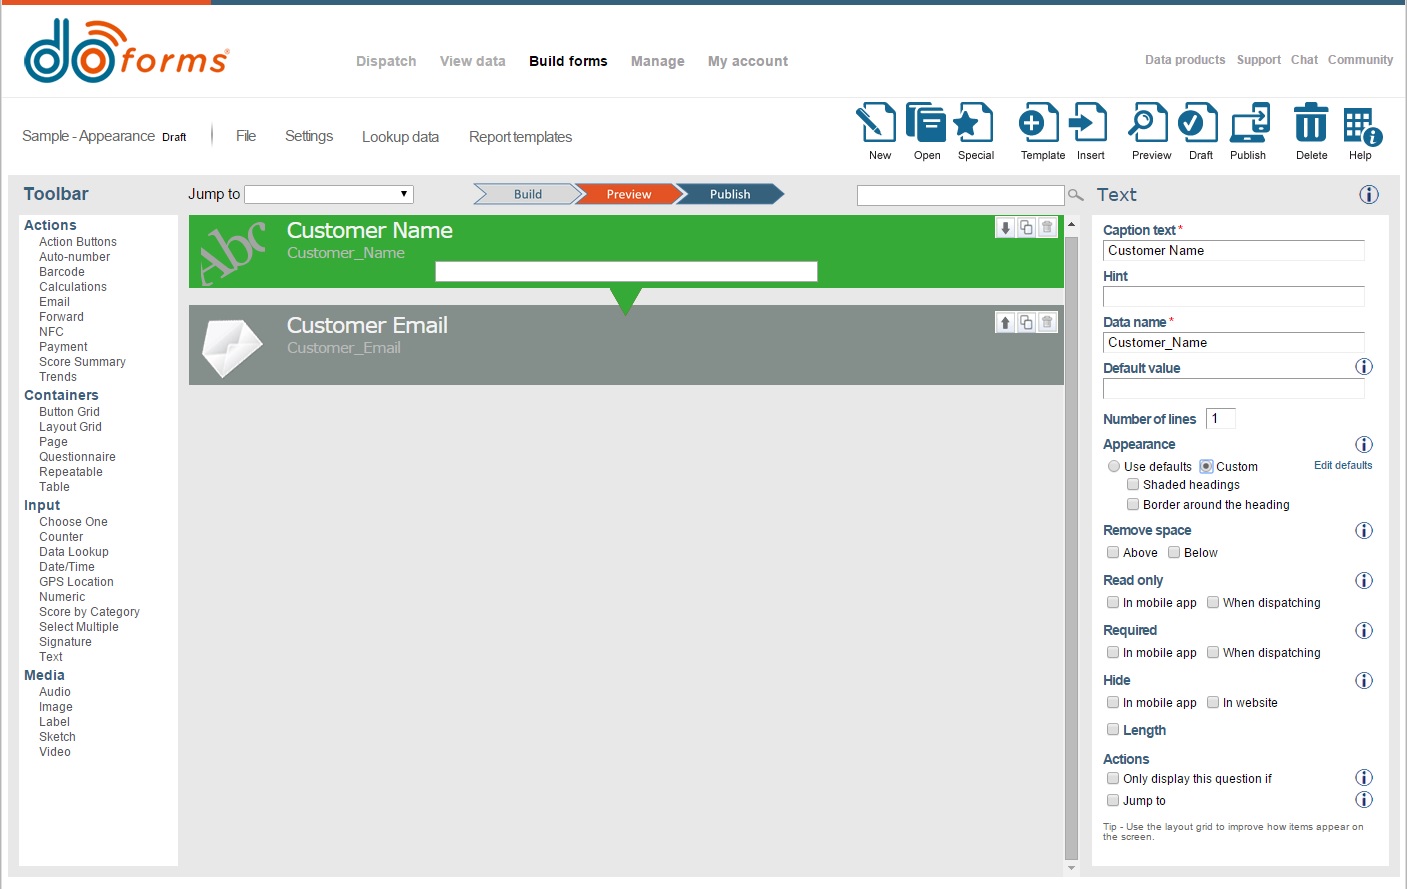
Form Canvas
The Form Canvas area is the center of the page, where you may use tools to build your forms. By selecting a tool, from the toolbar, you can drop it on the canvas, set its properties and preview its before publishing the form to your workforce.
Using the various tools, you can lay out your form, make it smart, and help get the answers to the questions you need answered.
Parameters
Once you drag a tool to the Form Canvas, the right menu will display configurable parameters
associated with that particular tool, with a red star indicating required fields. Most tools will
require at least a caption and data name.
Copy, Paste, Redo, Undo Options

The copy and paste feature is available in all forms and allows you to quickly select a single field or group of fields and either move or copy and paste them. Copy and pasting is also supported from one form to another form.
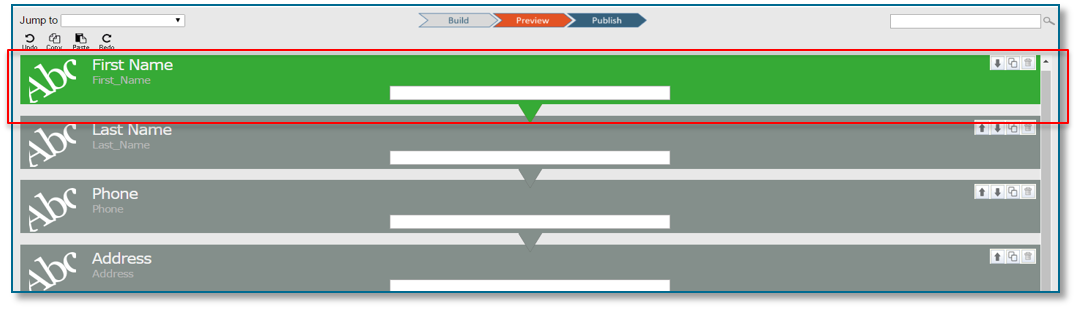
Copying and pasting a single field
- Select the field in build forms and click the copy button under the Jump to bar in the build screen.
- Select the field above where you want the field to be pasted and then click the paste button.
- Once paste is clicked it will add a duplicate field under the field that was selected when the user clicked paste.
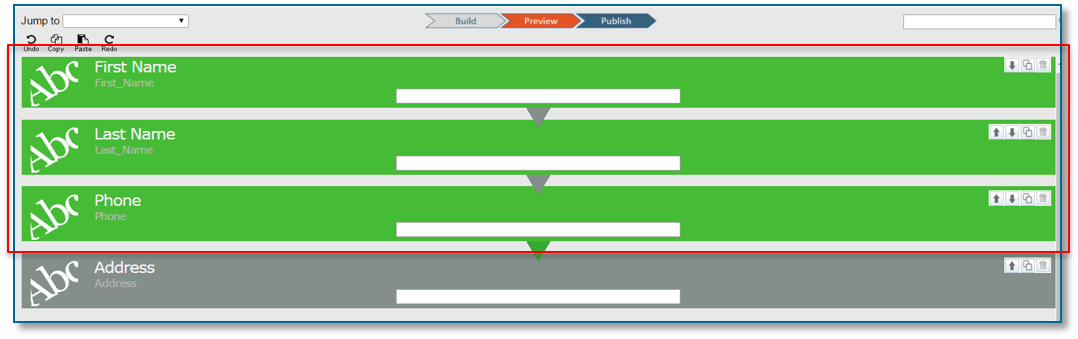
Copy and pasting a set of fields that are in order in build forms
- Select a starting field in build forms screen.
- Find the last field in the set that you wish to copy. For example, if I have Fields 1-5 in my form, I would select Field 1 then scroll down to Field 5.
- Hold the shift button and select the last field in the set .For example, once I scrolled down to field five I would hold shift and select Field 5 which would then highlight Fields 1-5.
- Click Copy.
- Select the field above where you want the field set to be pasted and then click the paste button.
Copy and pasting a set of fields that are not in order in build forms
- Select a starting field in build forms screen.
- While holding the CTRL key select any field you wish to include in the copy.
- Click copy.
- Select the field above where you want the field set to be pasted and then click the paste button.

Moving a group of fields
- Select a starting field in build forms screen.
- While holding the CTRL or SHIFT key select any field or group of fields you wish to move.
- Once all of the necessary fields are selected, click and drag any one of the selected fields up or down the form to the area of your choosing. Once you release the click and drag the fields that were selected will now be moved the area in which you dragged to.
Undo- The Undo button will undo the last change the user pasted, moved, deleted, etc. The redo button will undo the undo button. This button is a way for users to redo an undo they recently did.
Redo- The Redo button reverses the last action you performed.
Delete- The Delete button allows users to select a single field or multiple fields and delete them. This is useful for situations where large chunks of a form need to be deleted.
Menu Options

File: Provides the ability to save your form New form Open an existing form Publish & Unpublish a form Create a report template Export your structure. Load an industry based template Publish your form as a template
Settings : helps set form icon used on the mobile device
Form appearance Sets the layout and color options for your form. This theming capability may be set for most of the elements on the form. See Advanced Appearance for more details.
Record Name Sets the critical fields for quick review in the view data tab.
Record Templates Using the fields defined in your form you may use the default or Standard template or Customize your PDF and/or Excel output. See Reports & Report Templates for additional details.
Creating a Form
When you start the form builder, a blank canvas will be displayed with an untitled form. You may also use the File menu to select a form from the Forms Library which you can use as a starting point for further customization.
Note that all forms have three possible states:
Draft – This indicates that the form is a “work in progress” and not available to any mobile units.
Preview – This allows you to see what the form will look like before publishing to your mobiles. This is great for usability testing and ensuring your ideas are implemented as you need them to be.
Published – This indicates that a form is complete. This indicates that a form is complete, and ready to be assigned. Published forms are automatically added to the Main Project which is subscribed to by all mobile units automatically.