
Start by logging into your doForms website account at www.mydoforms.com and choose the Build Forms tab. When this tab opens you will see a blank page where you can start building a form.
TIP: For some inspiration, you can visit our Industry Template Library that contains lots of forms that you can use as examples. You can start with one of these forms and edit to customize it to your needs. This can be done by going to Build > Forms > File > Add Industry Template.
On the left side of the page there’s a selection of available “widgets” that you will use for building your forms. To build a form you just stack these widgets in the order you want the questions to be answered. Or, you can place the widgets into “containers” to organize them in other ways (say in a grid format). To find out more about all the available widgets and containers, see this article.
Adding a widget or container to your form is as simple as clicking or dragging and dropping it onto the form canvas (the big gray area). Once added, the panel on the right displays the Properties of the selected (green) widget. These Properties allow you to manage how the selected widget looks and works.
Build a resume form
With this introduction in mind, build a simple Resume form. To keep things simple, we will avoid using containers and just stick to the basic question widgets.
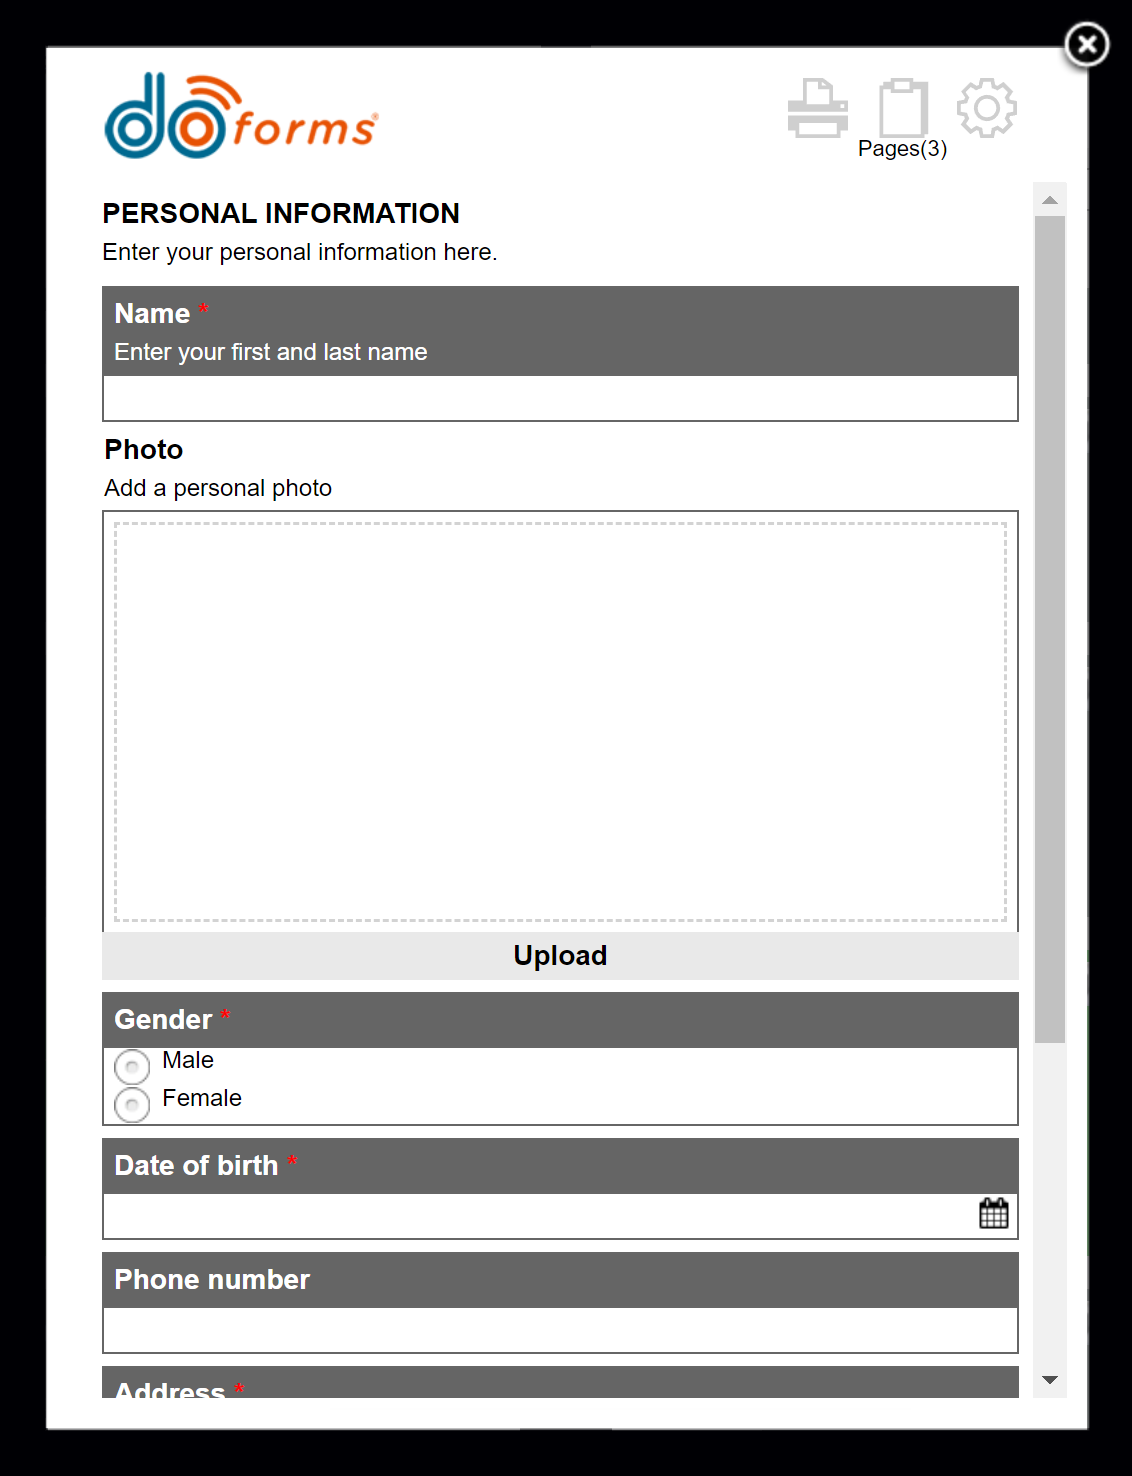
Let’s start by adding a section title called PERSONAL INFORMATION by using a Label widget. Labels can contain text and/or a graphic:
- Add the Label widget by clicking or drag and dropping the Label widget to place it at the top of the form canvas.
- Then type “PERSONAL INFORMATION” in the Caption property.
- Add additional instructions in the Hint property.

Now, let’s add the first question in the form, in this case a text entry widget for entering a name:
- Click or drag and drop a Text widget below the Label.
- Type “Name” in the Caption property.
- Type “Enter your first and last name” in the Hint Property.
- Check the Required properties so that entering a name is mandatory.

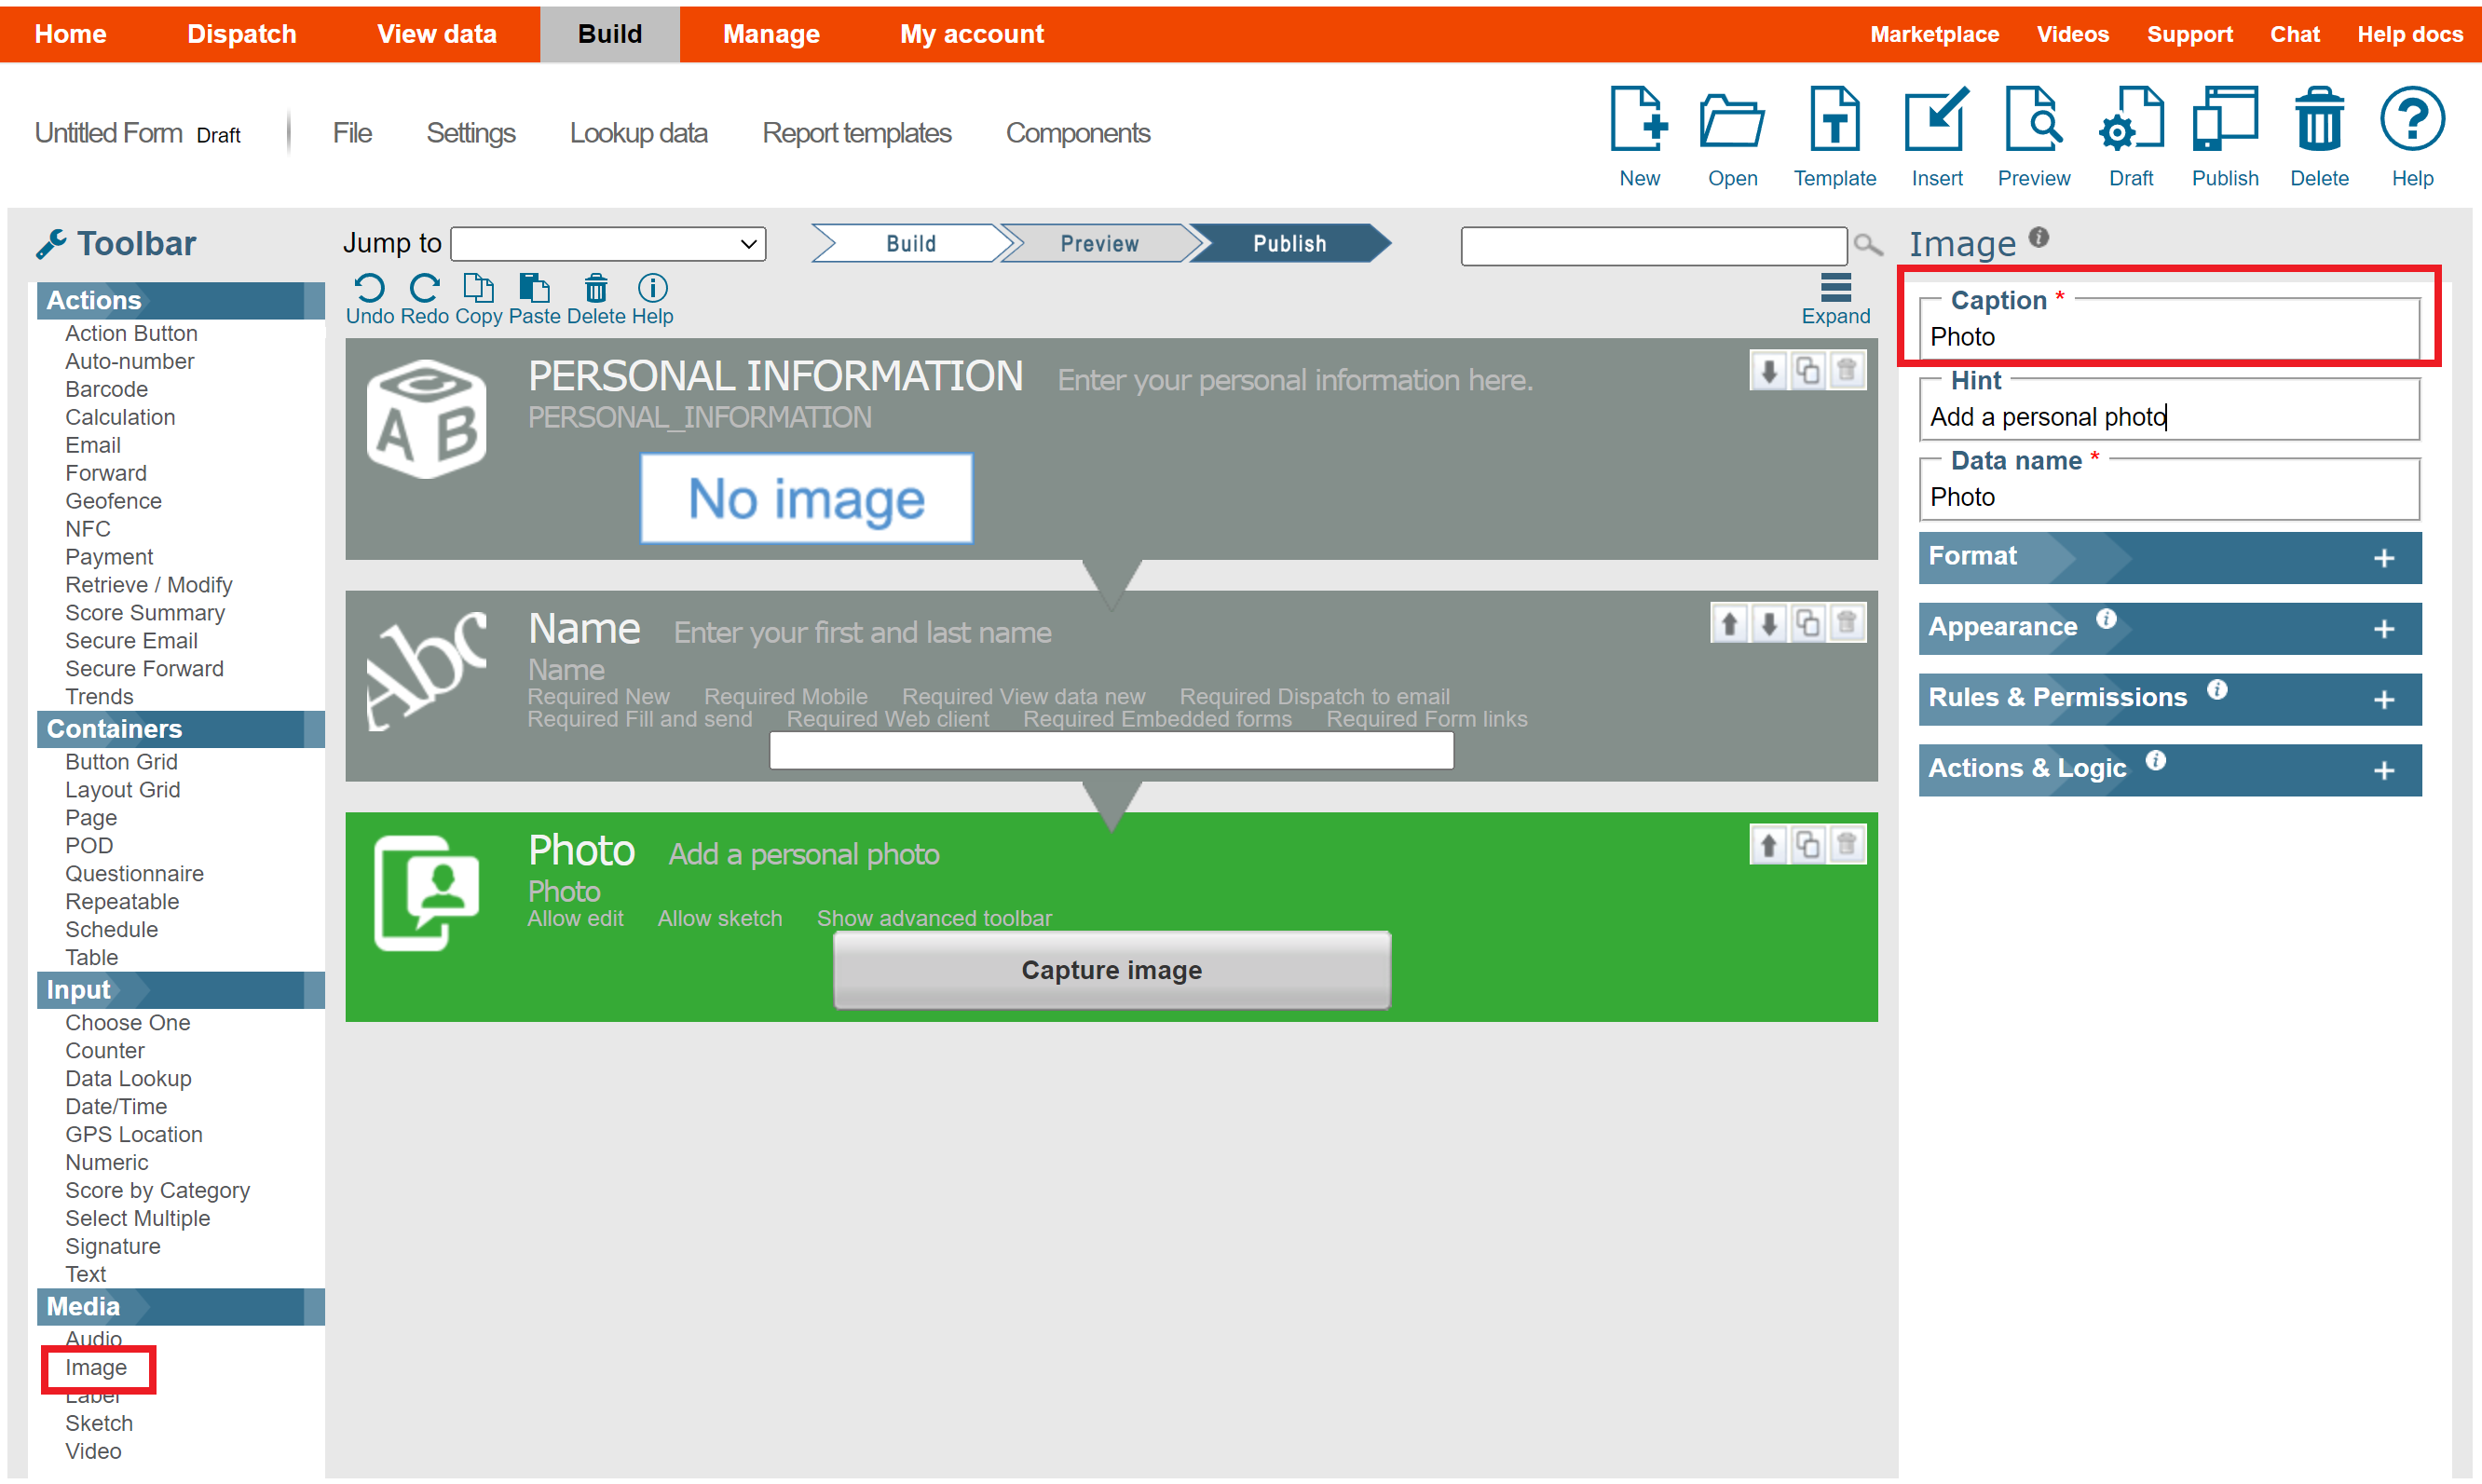
Next, let’s add an image widget for adding a photo:
- Add an Image widget below the previous question.
- Type “Photo” in the Caption property.
- Type “Add a personal photo” in the Hint Property.
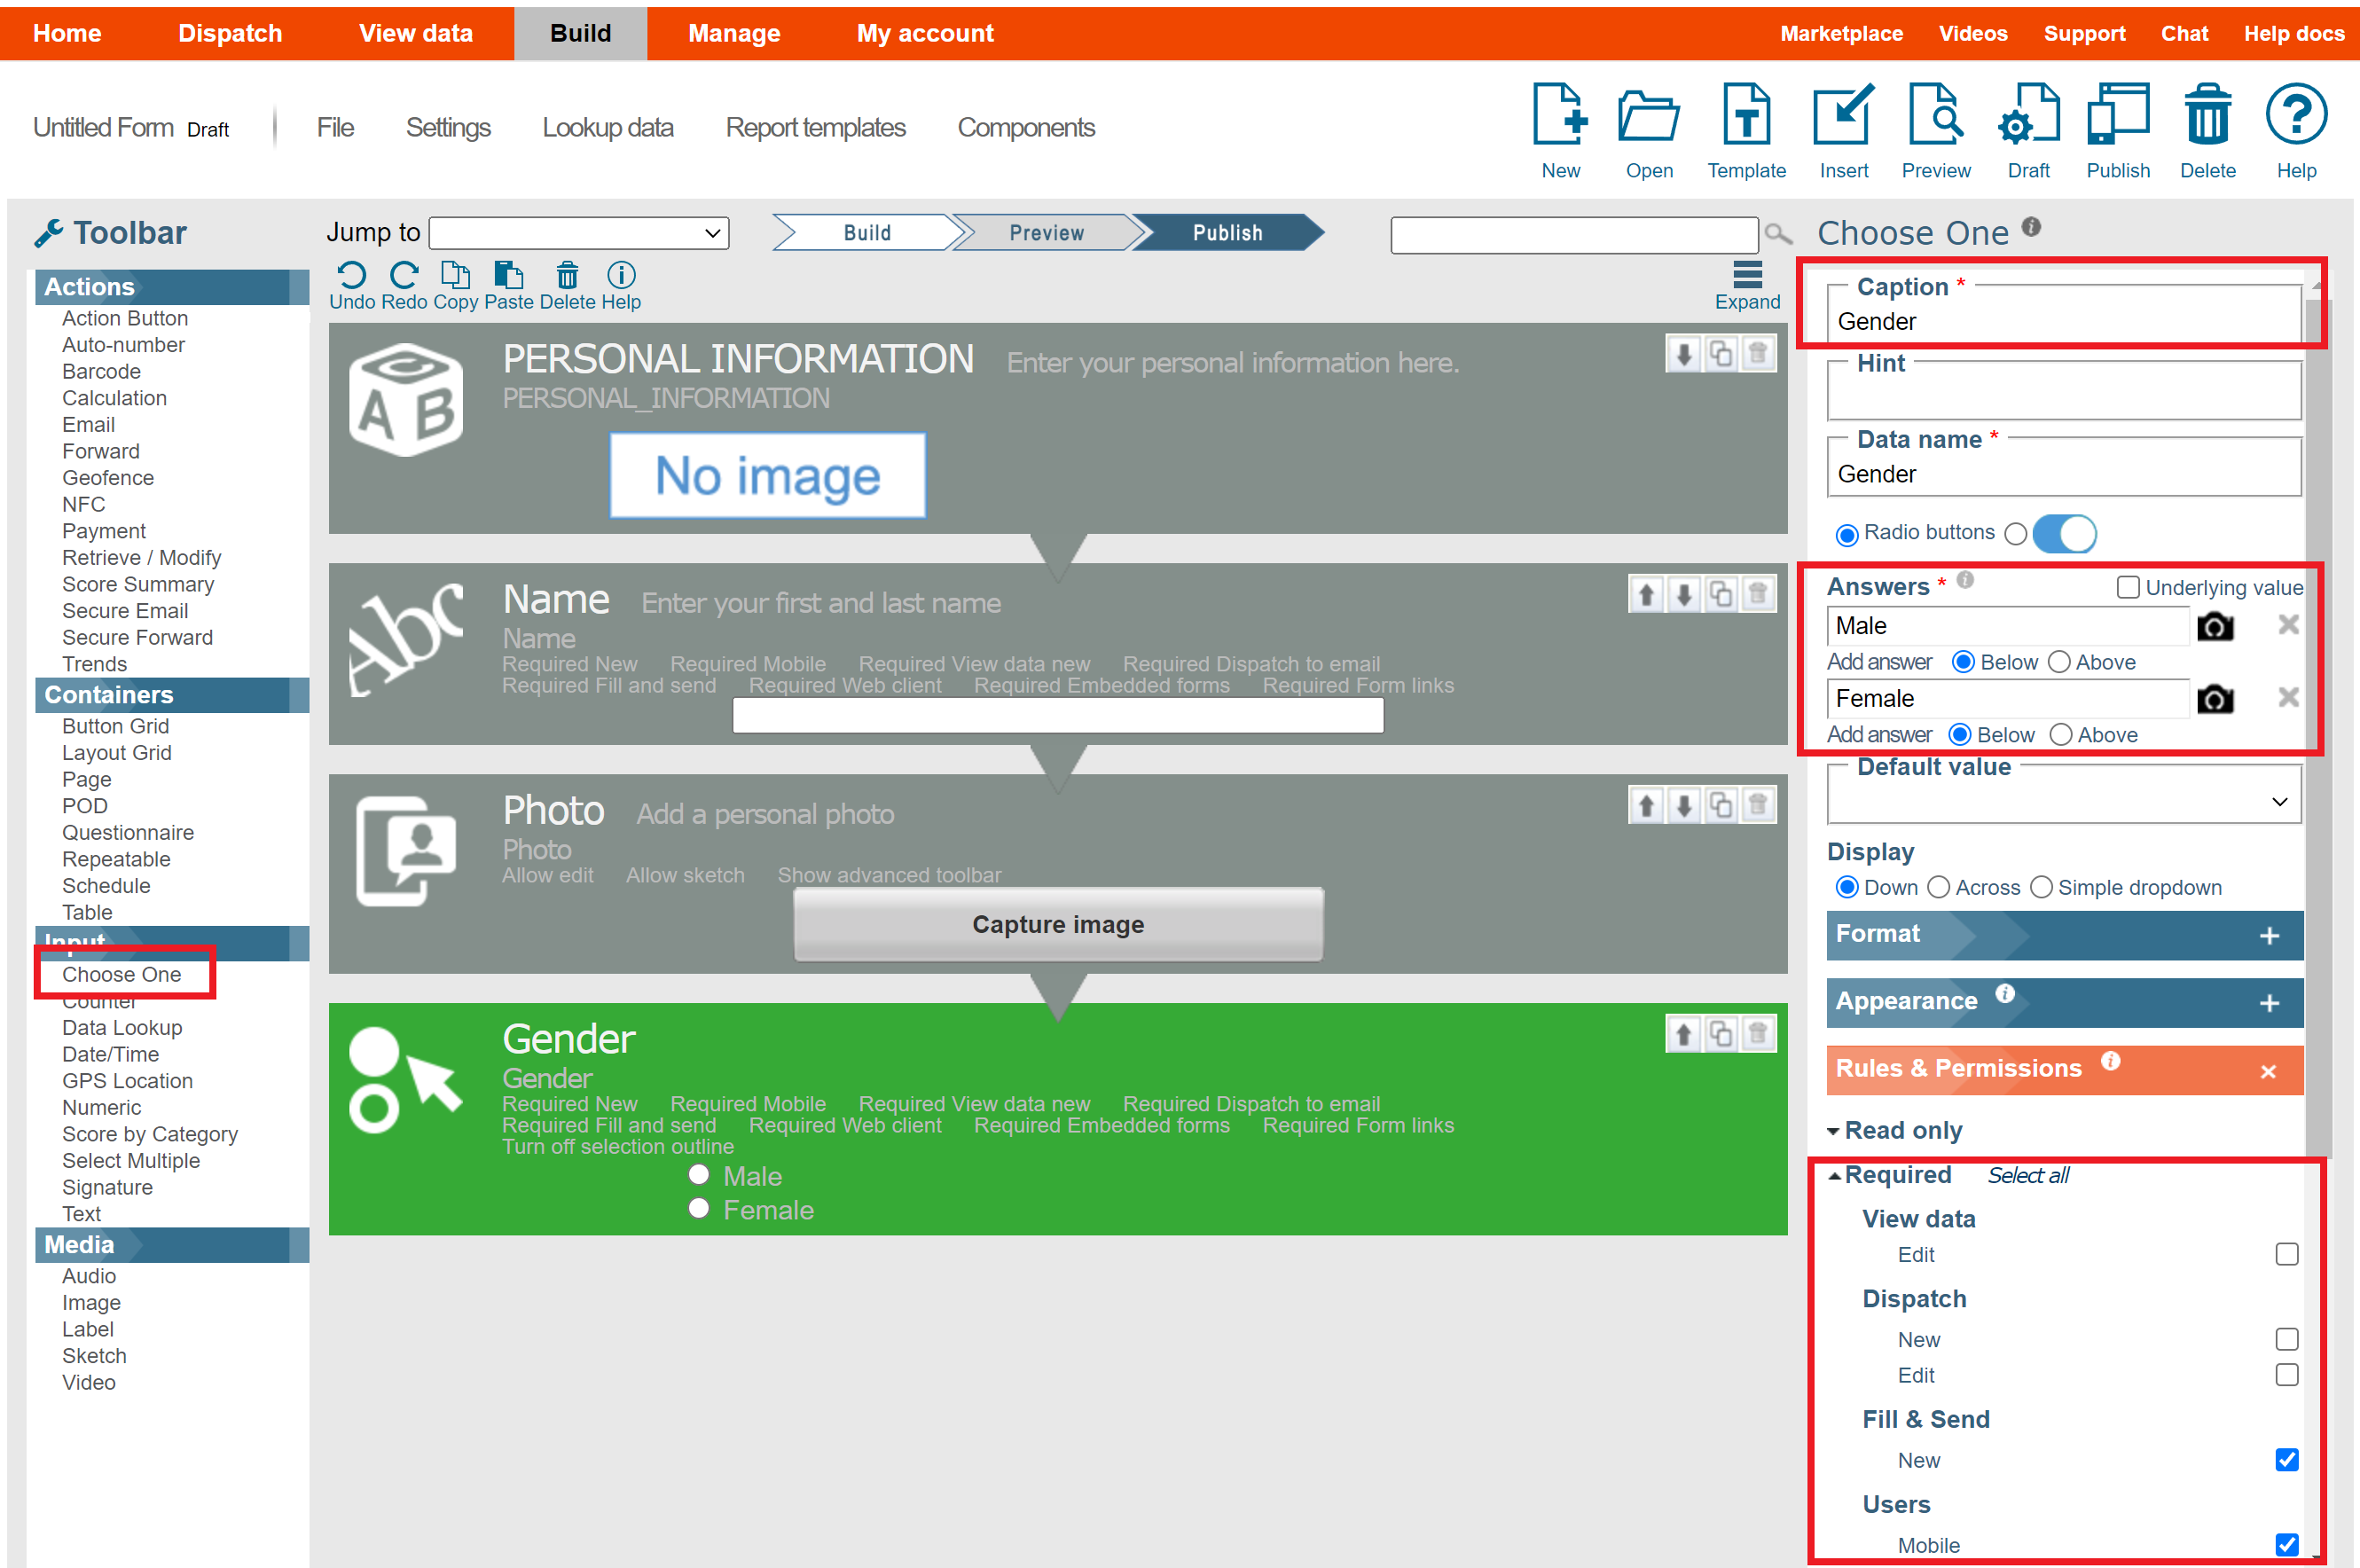
Next, let’s add a multiple choice widget for gender:
- Drag and drop a Choose One widget below the previous question.
- Type “Gender” in the Caption property (in this case we will not include a Hint).
- Under Answers type "Male". Click Add answer and then type "Female".
- Check the Required properties.
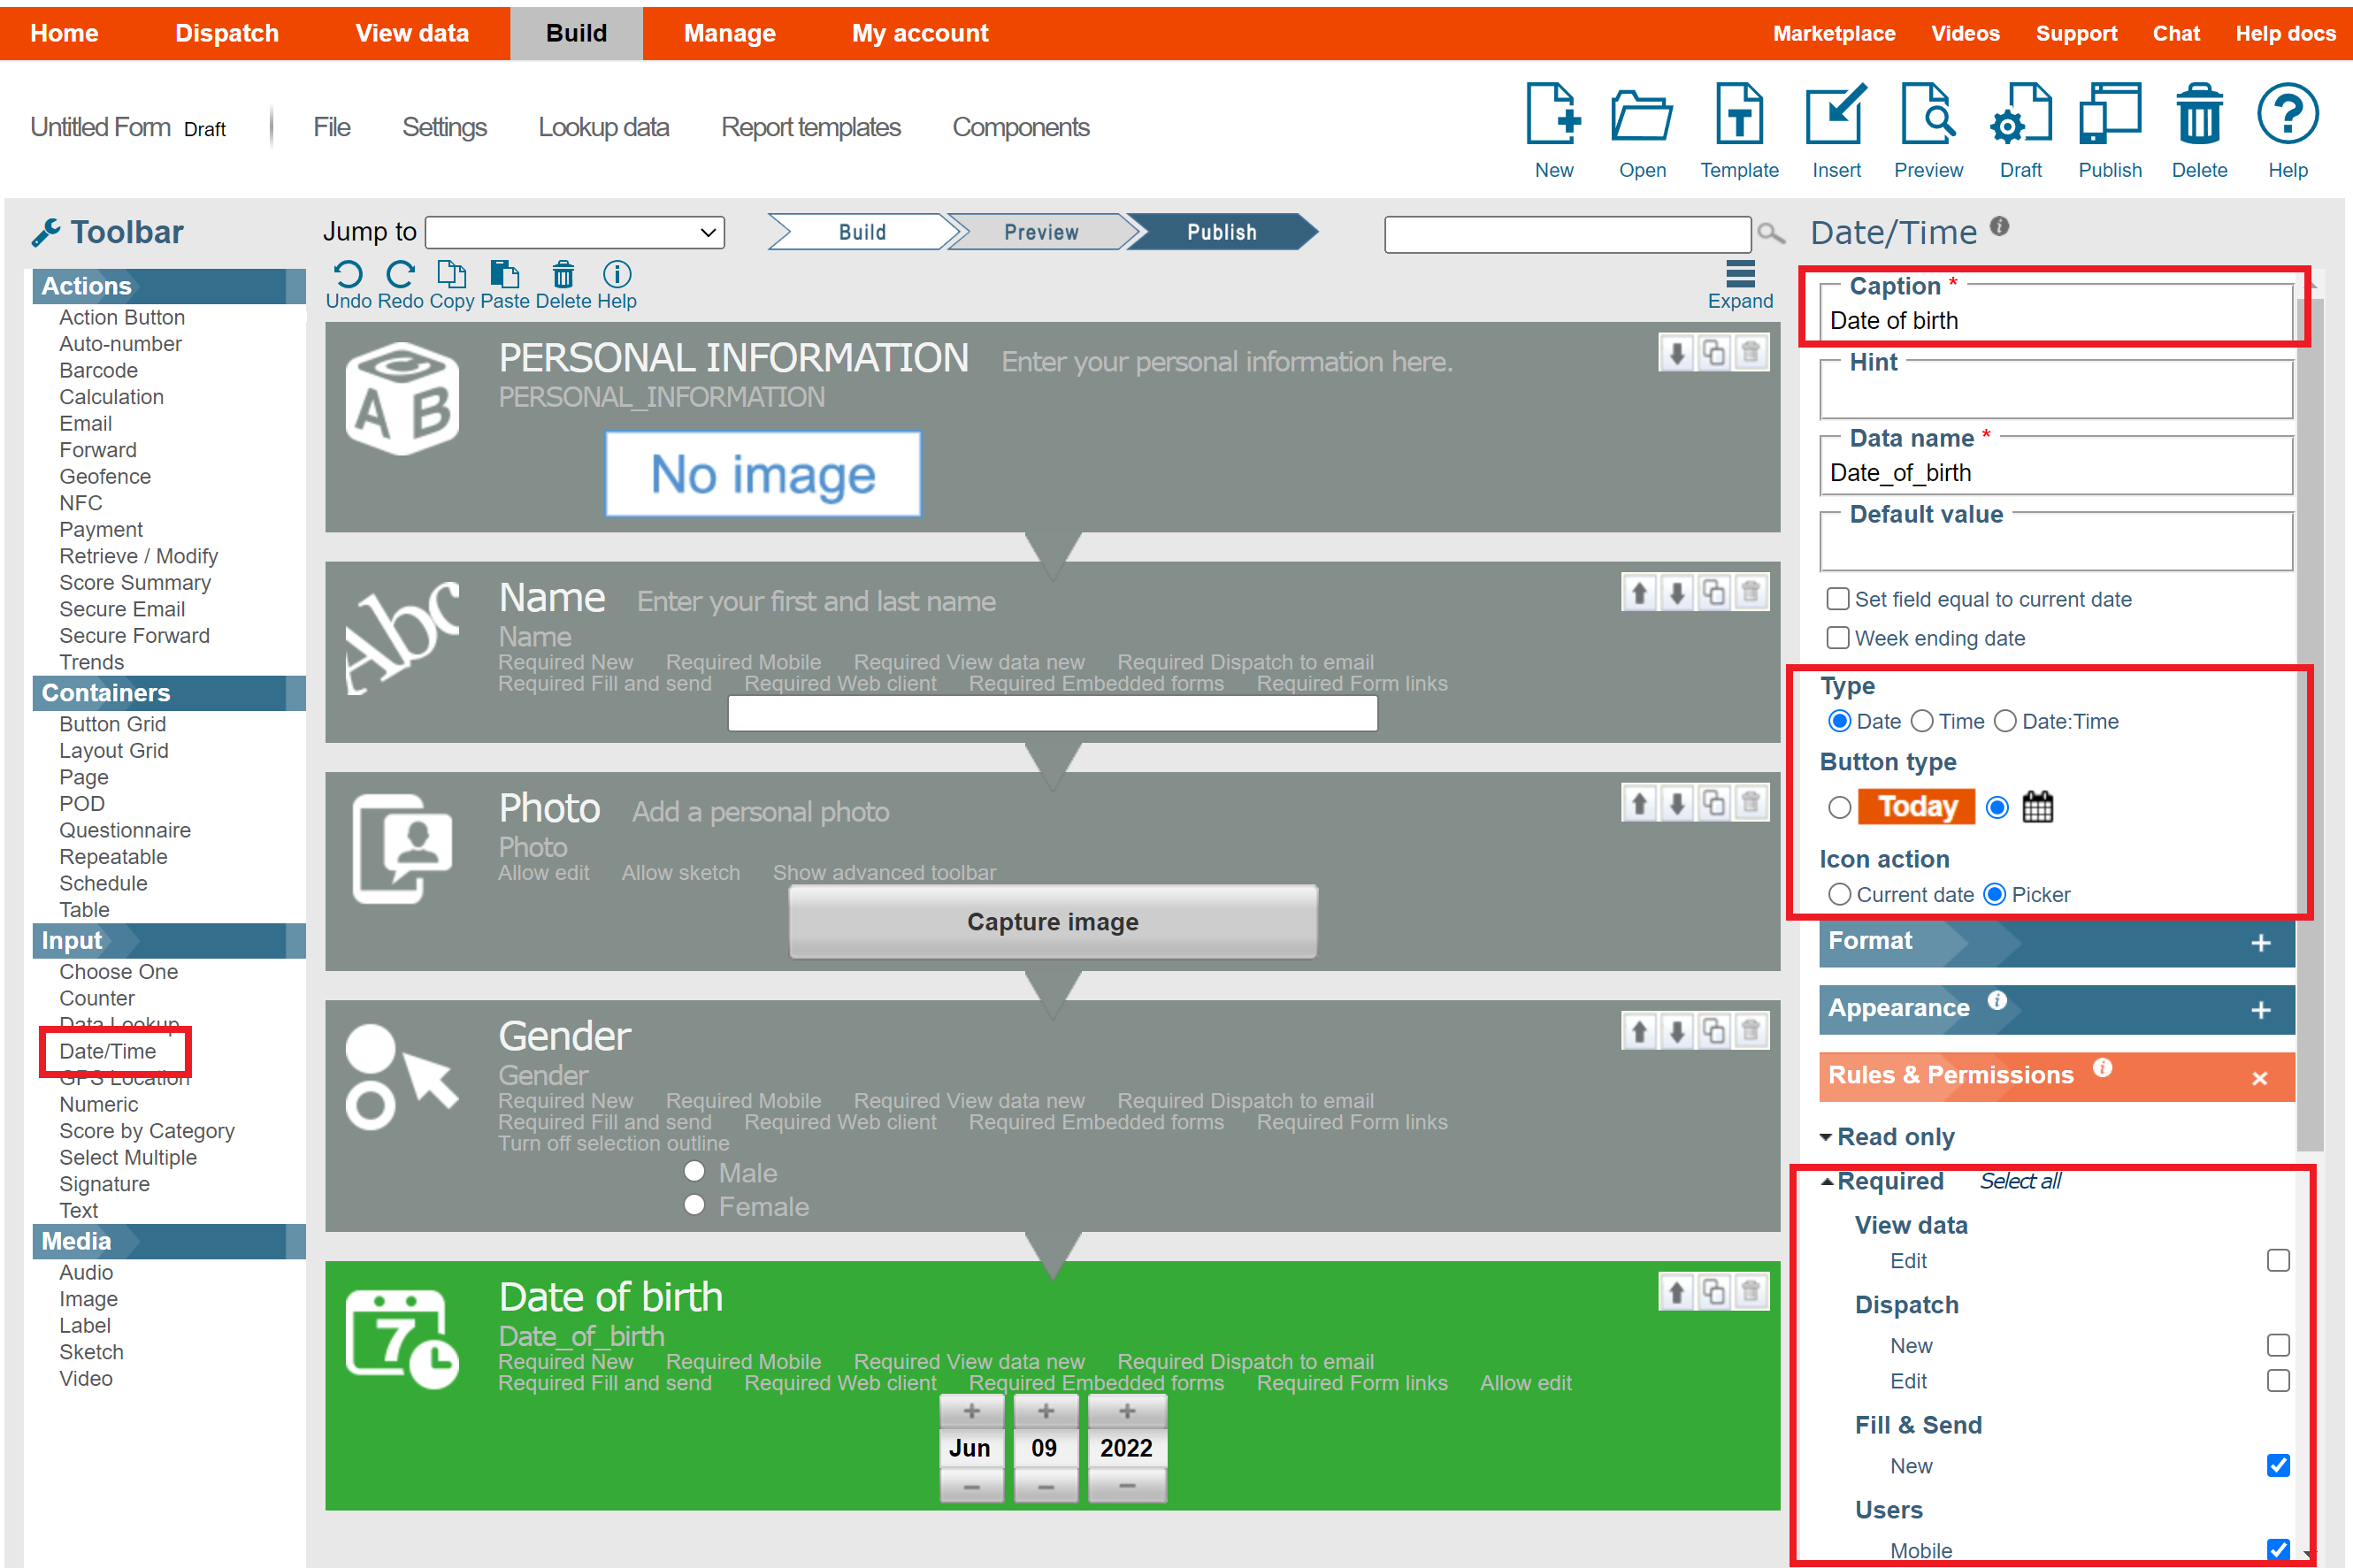
Next, we’ll use the Date/Time widget to insert date of birth:
- Click the Date/Time widget and drag and drop it below the previous question.
- Insert “Date of birth” in the Caption section.
- Make sure the Type option is set to Date.
- Change the Button type to a a calendar icon and the Icon action to Picker.
- Mark the question as Required.
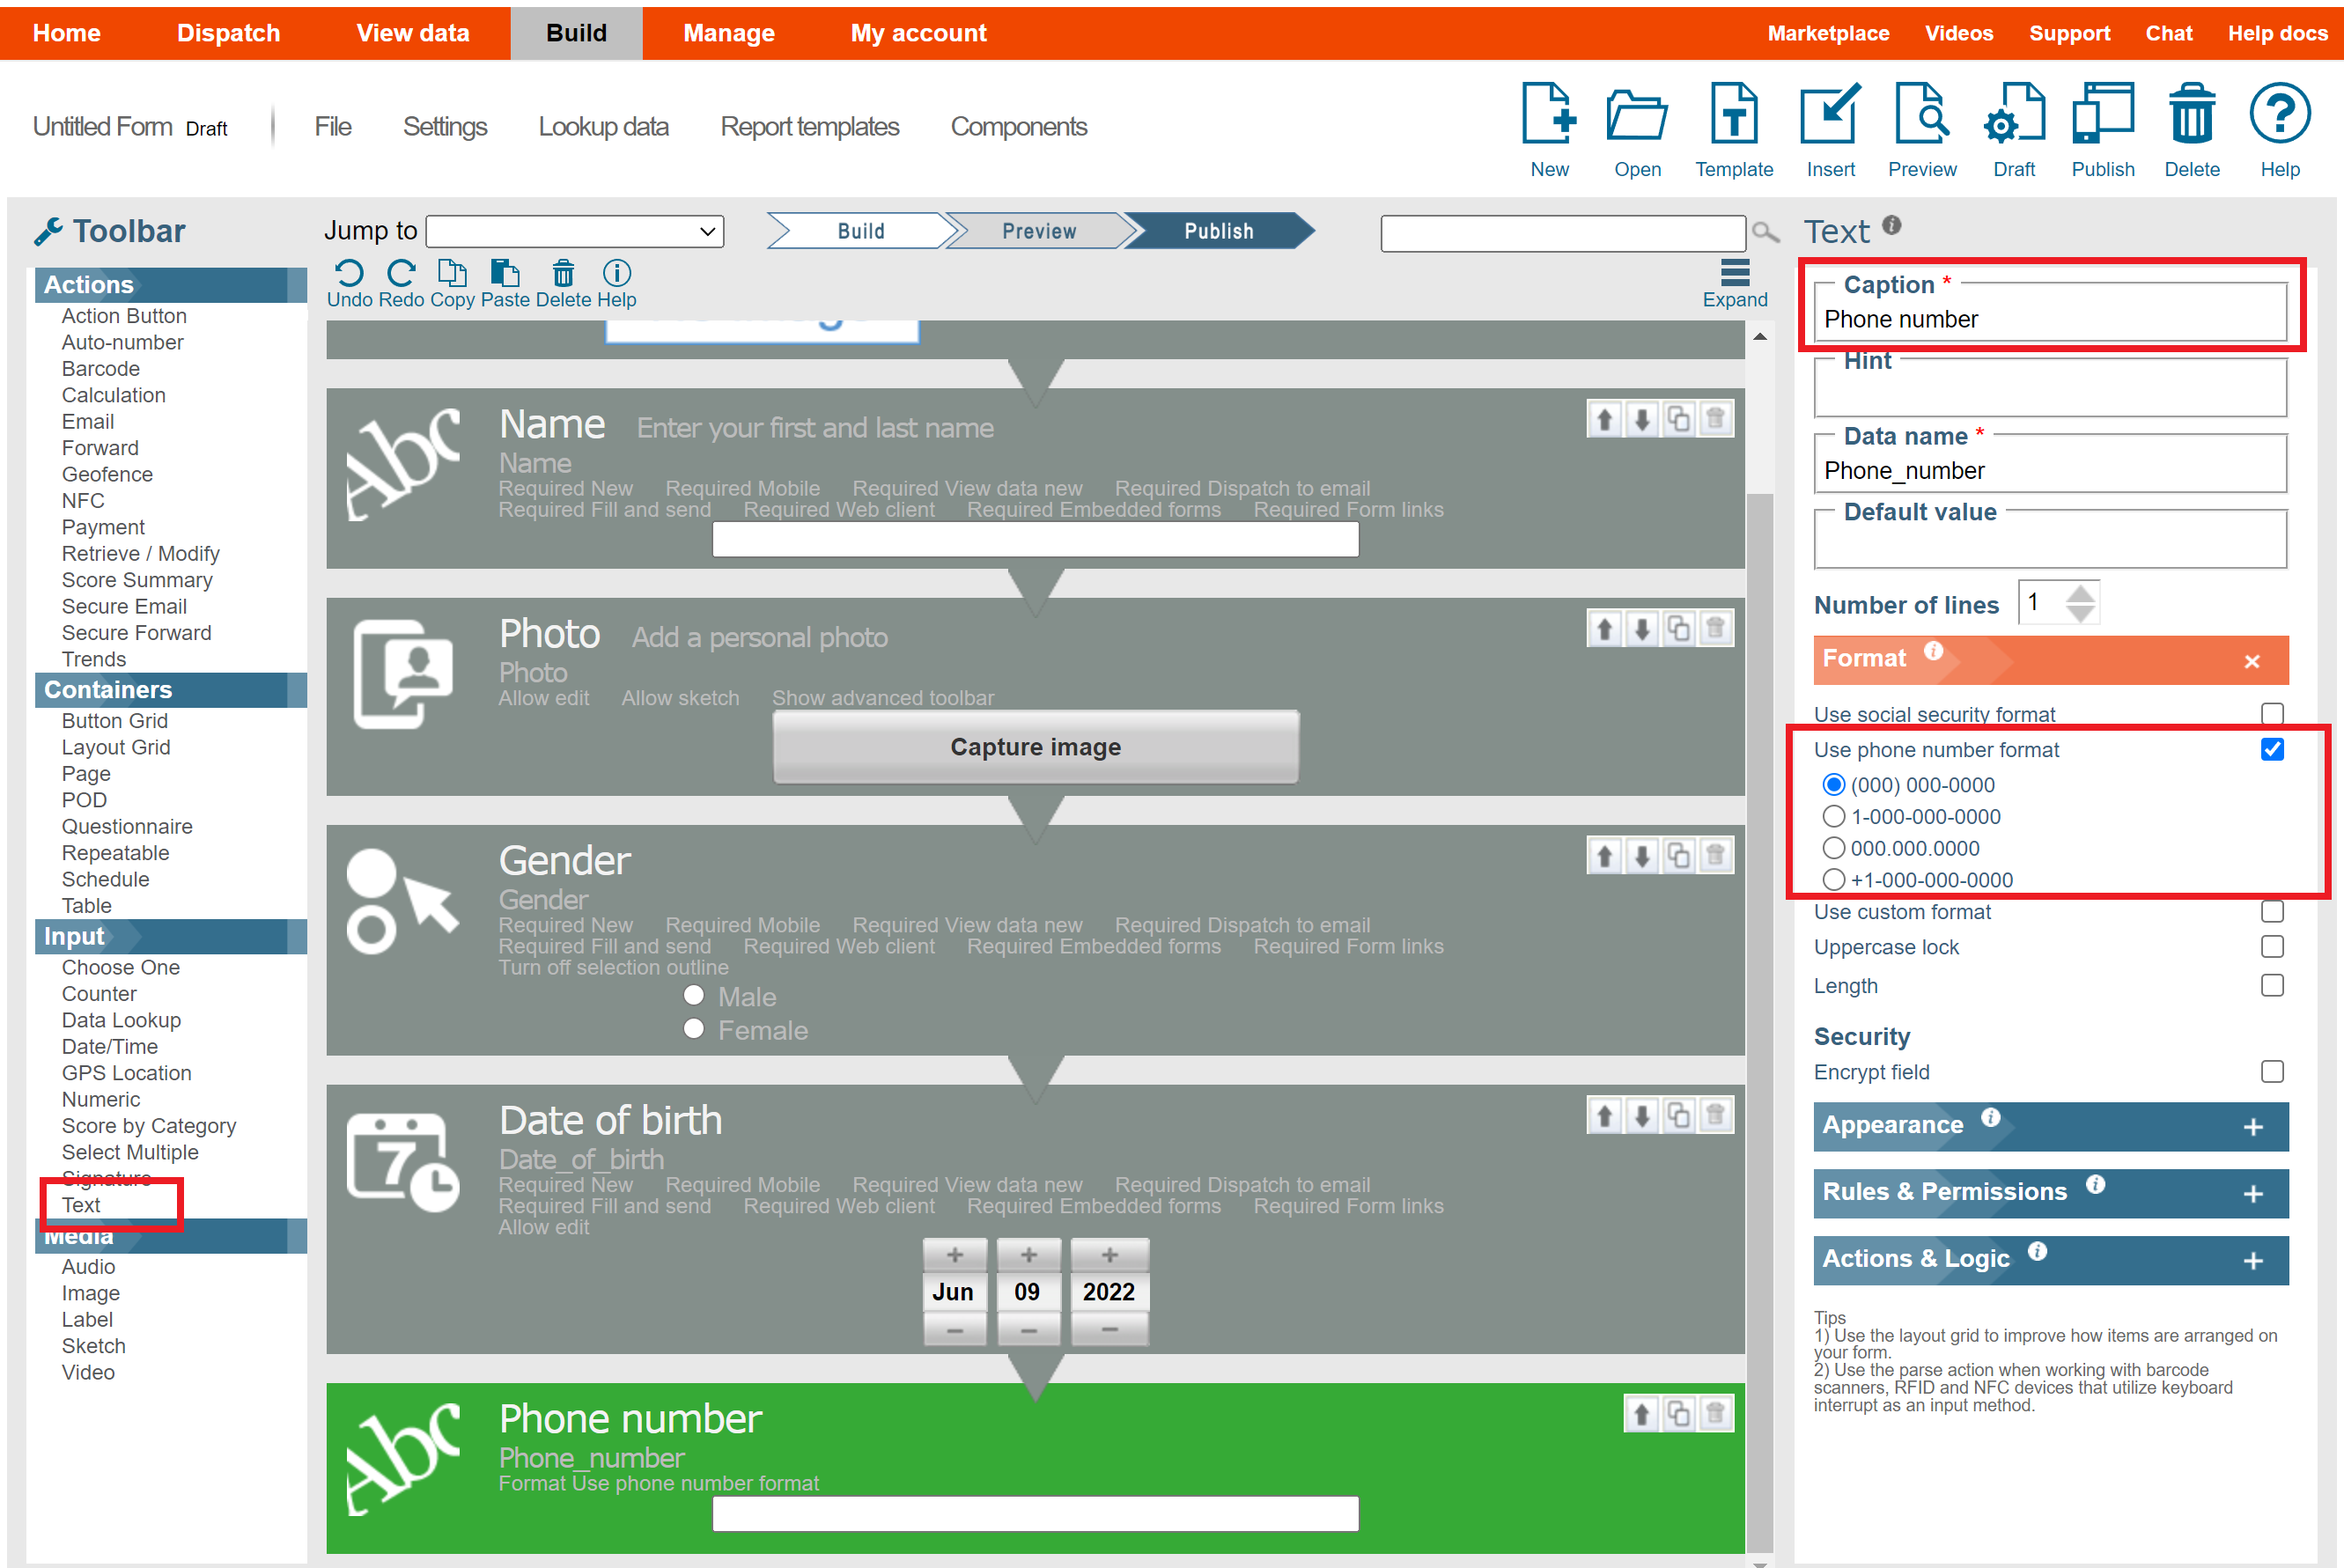
Next, use a Text widget to add a phone number:
- Drag and drop a Text widget below the previous question.
- Type “Phone number” in the Caption.
- Set the Format to your desired phone number format.
Next, add a Text widget for entering an address:
- Drag and drop a Text widget below the previous question.
- Type “Address” in the Caption.
- Specify that what you want is to “Add physical address” in the Hint section.
- Mark it Required.
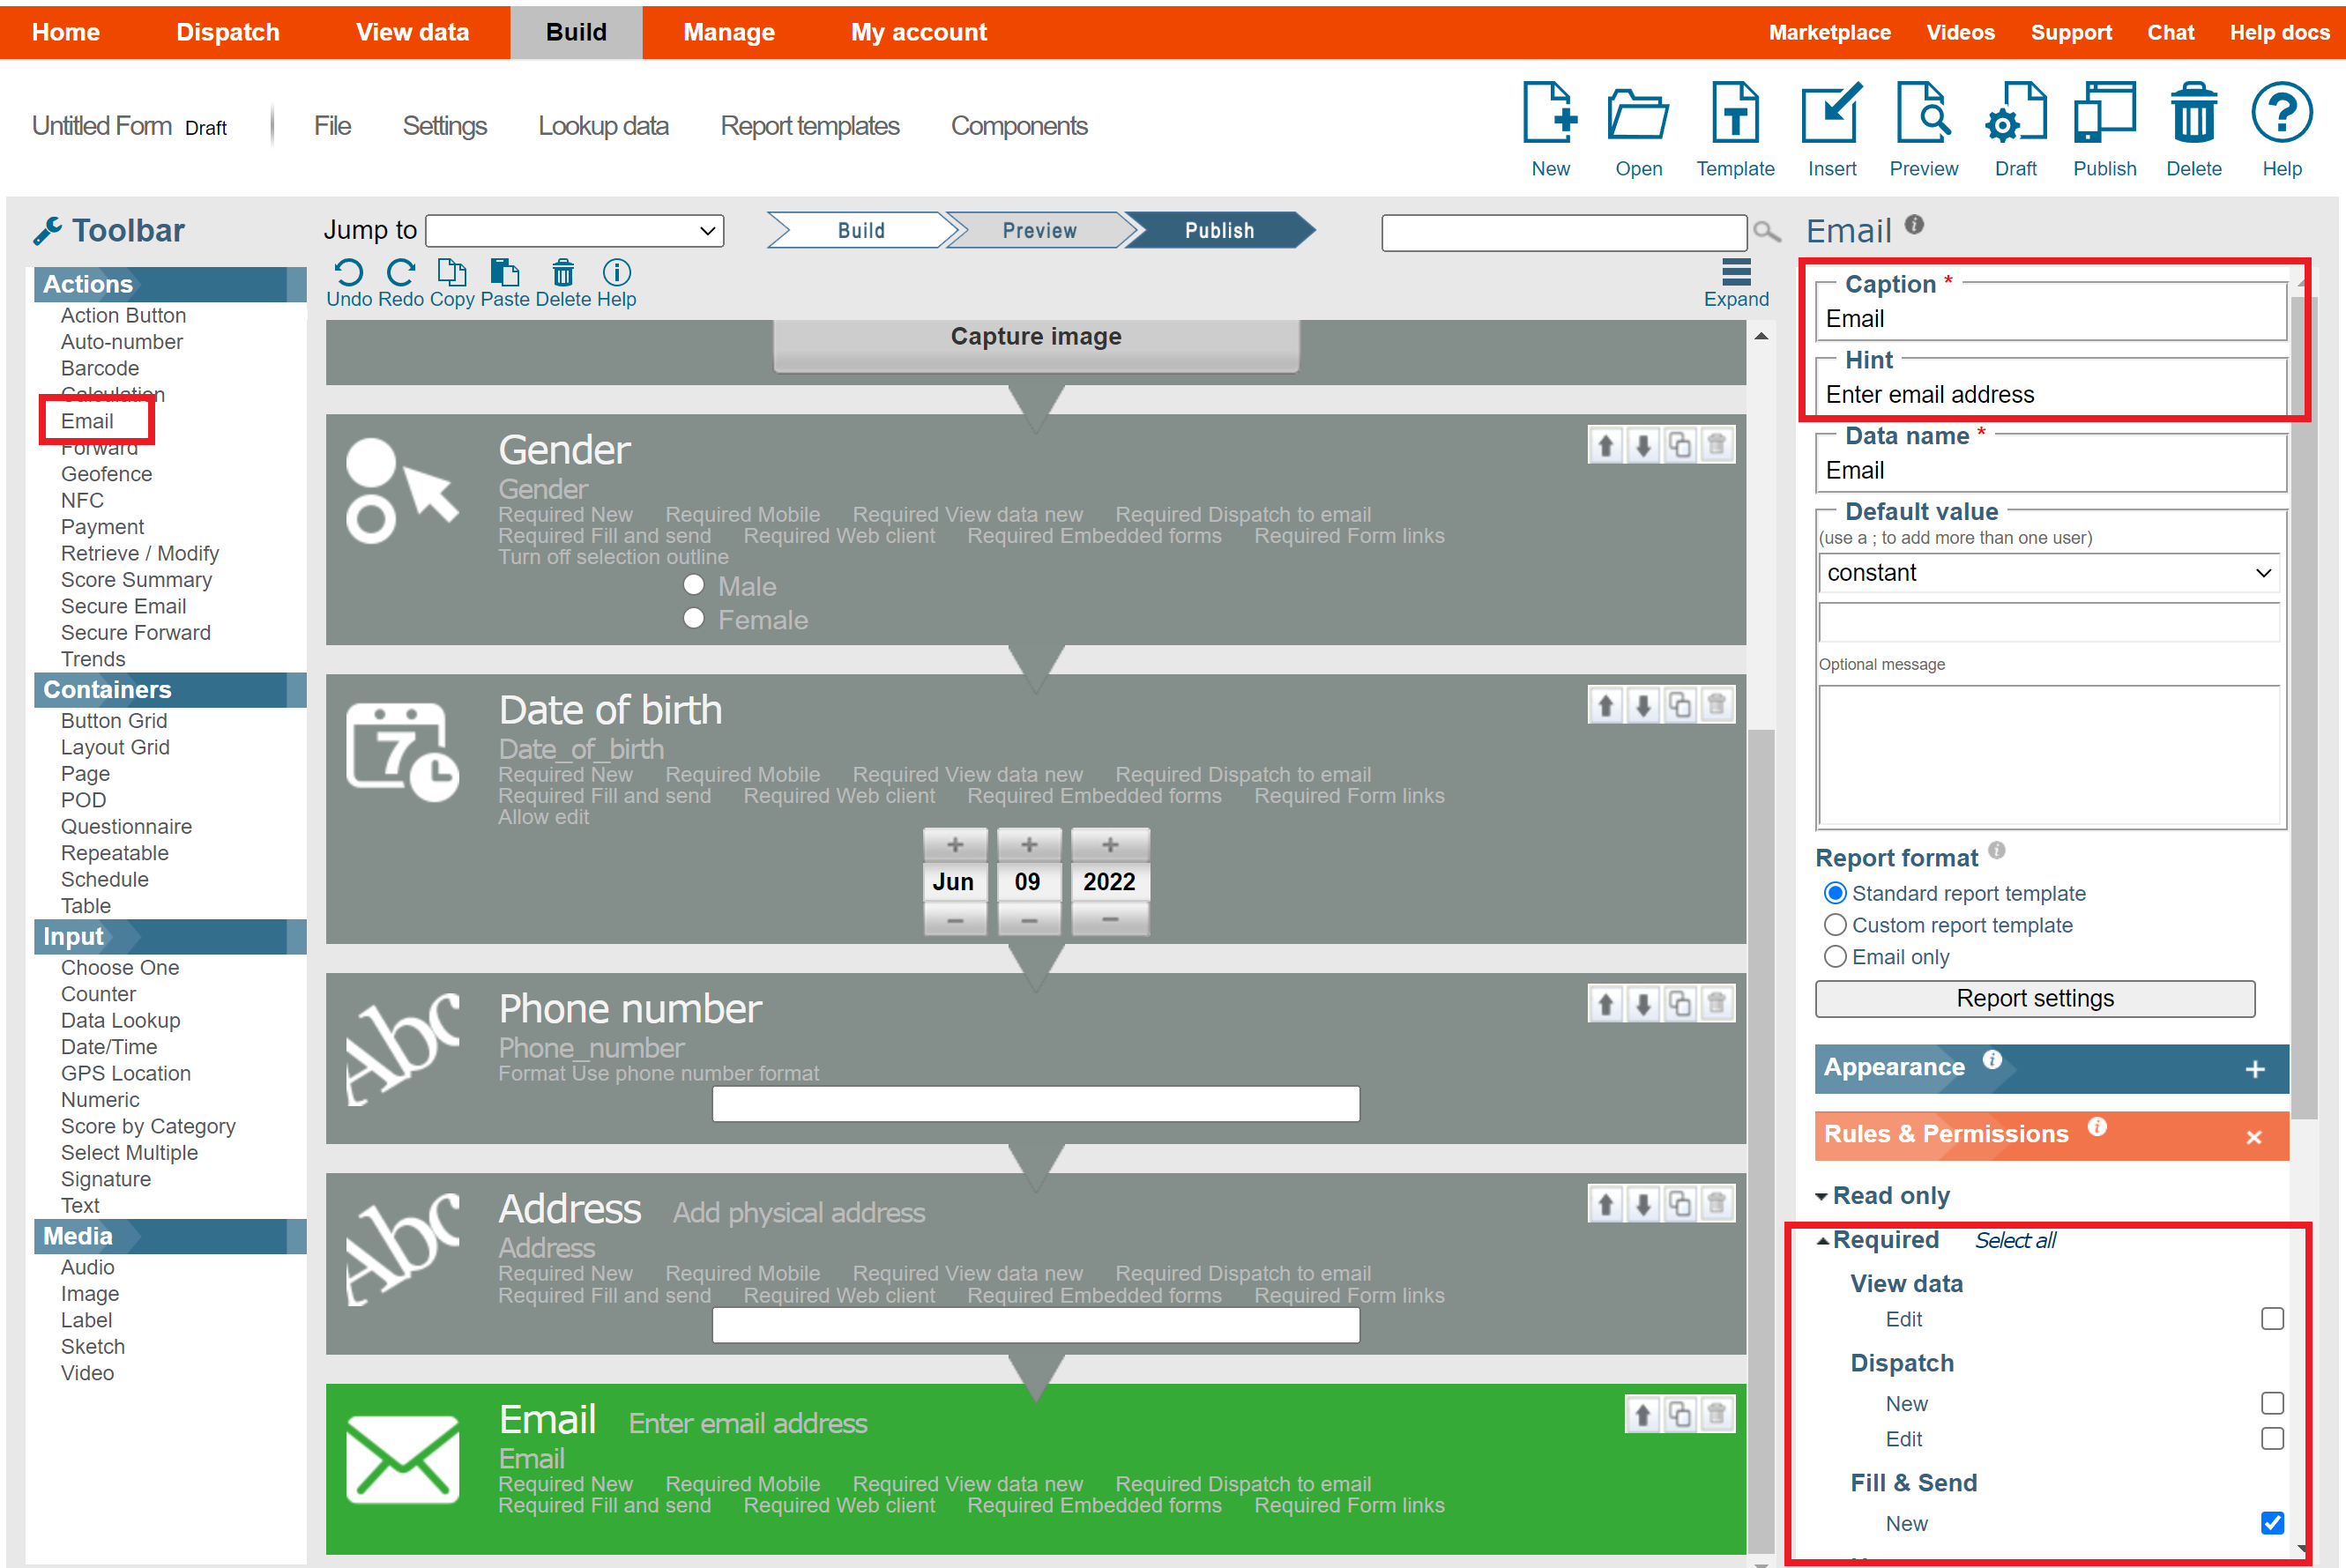
Continue by using the Email widget to add an email address. The email address will receive the completed form:
- Drag and drop an Email widget below the previous question.
- Type "Email" in the Caption.
- Type “Enter email address” in the Hint section.
- This is also Required.
Next, it is useful to use a Text widget to state the position applied for:
- Drag and drop a Text widget below the previous question.
- Insert “Applying for” text in the Caption section.
- Add the description “Job title applied for” in the Hint section.
- Mark it as Required information.
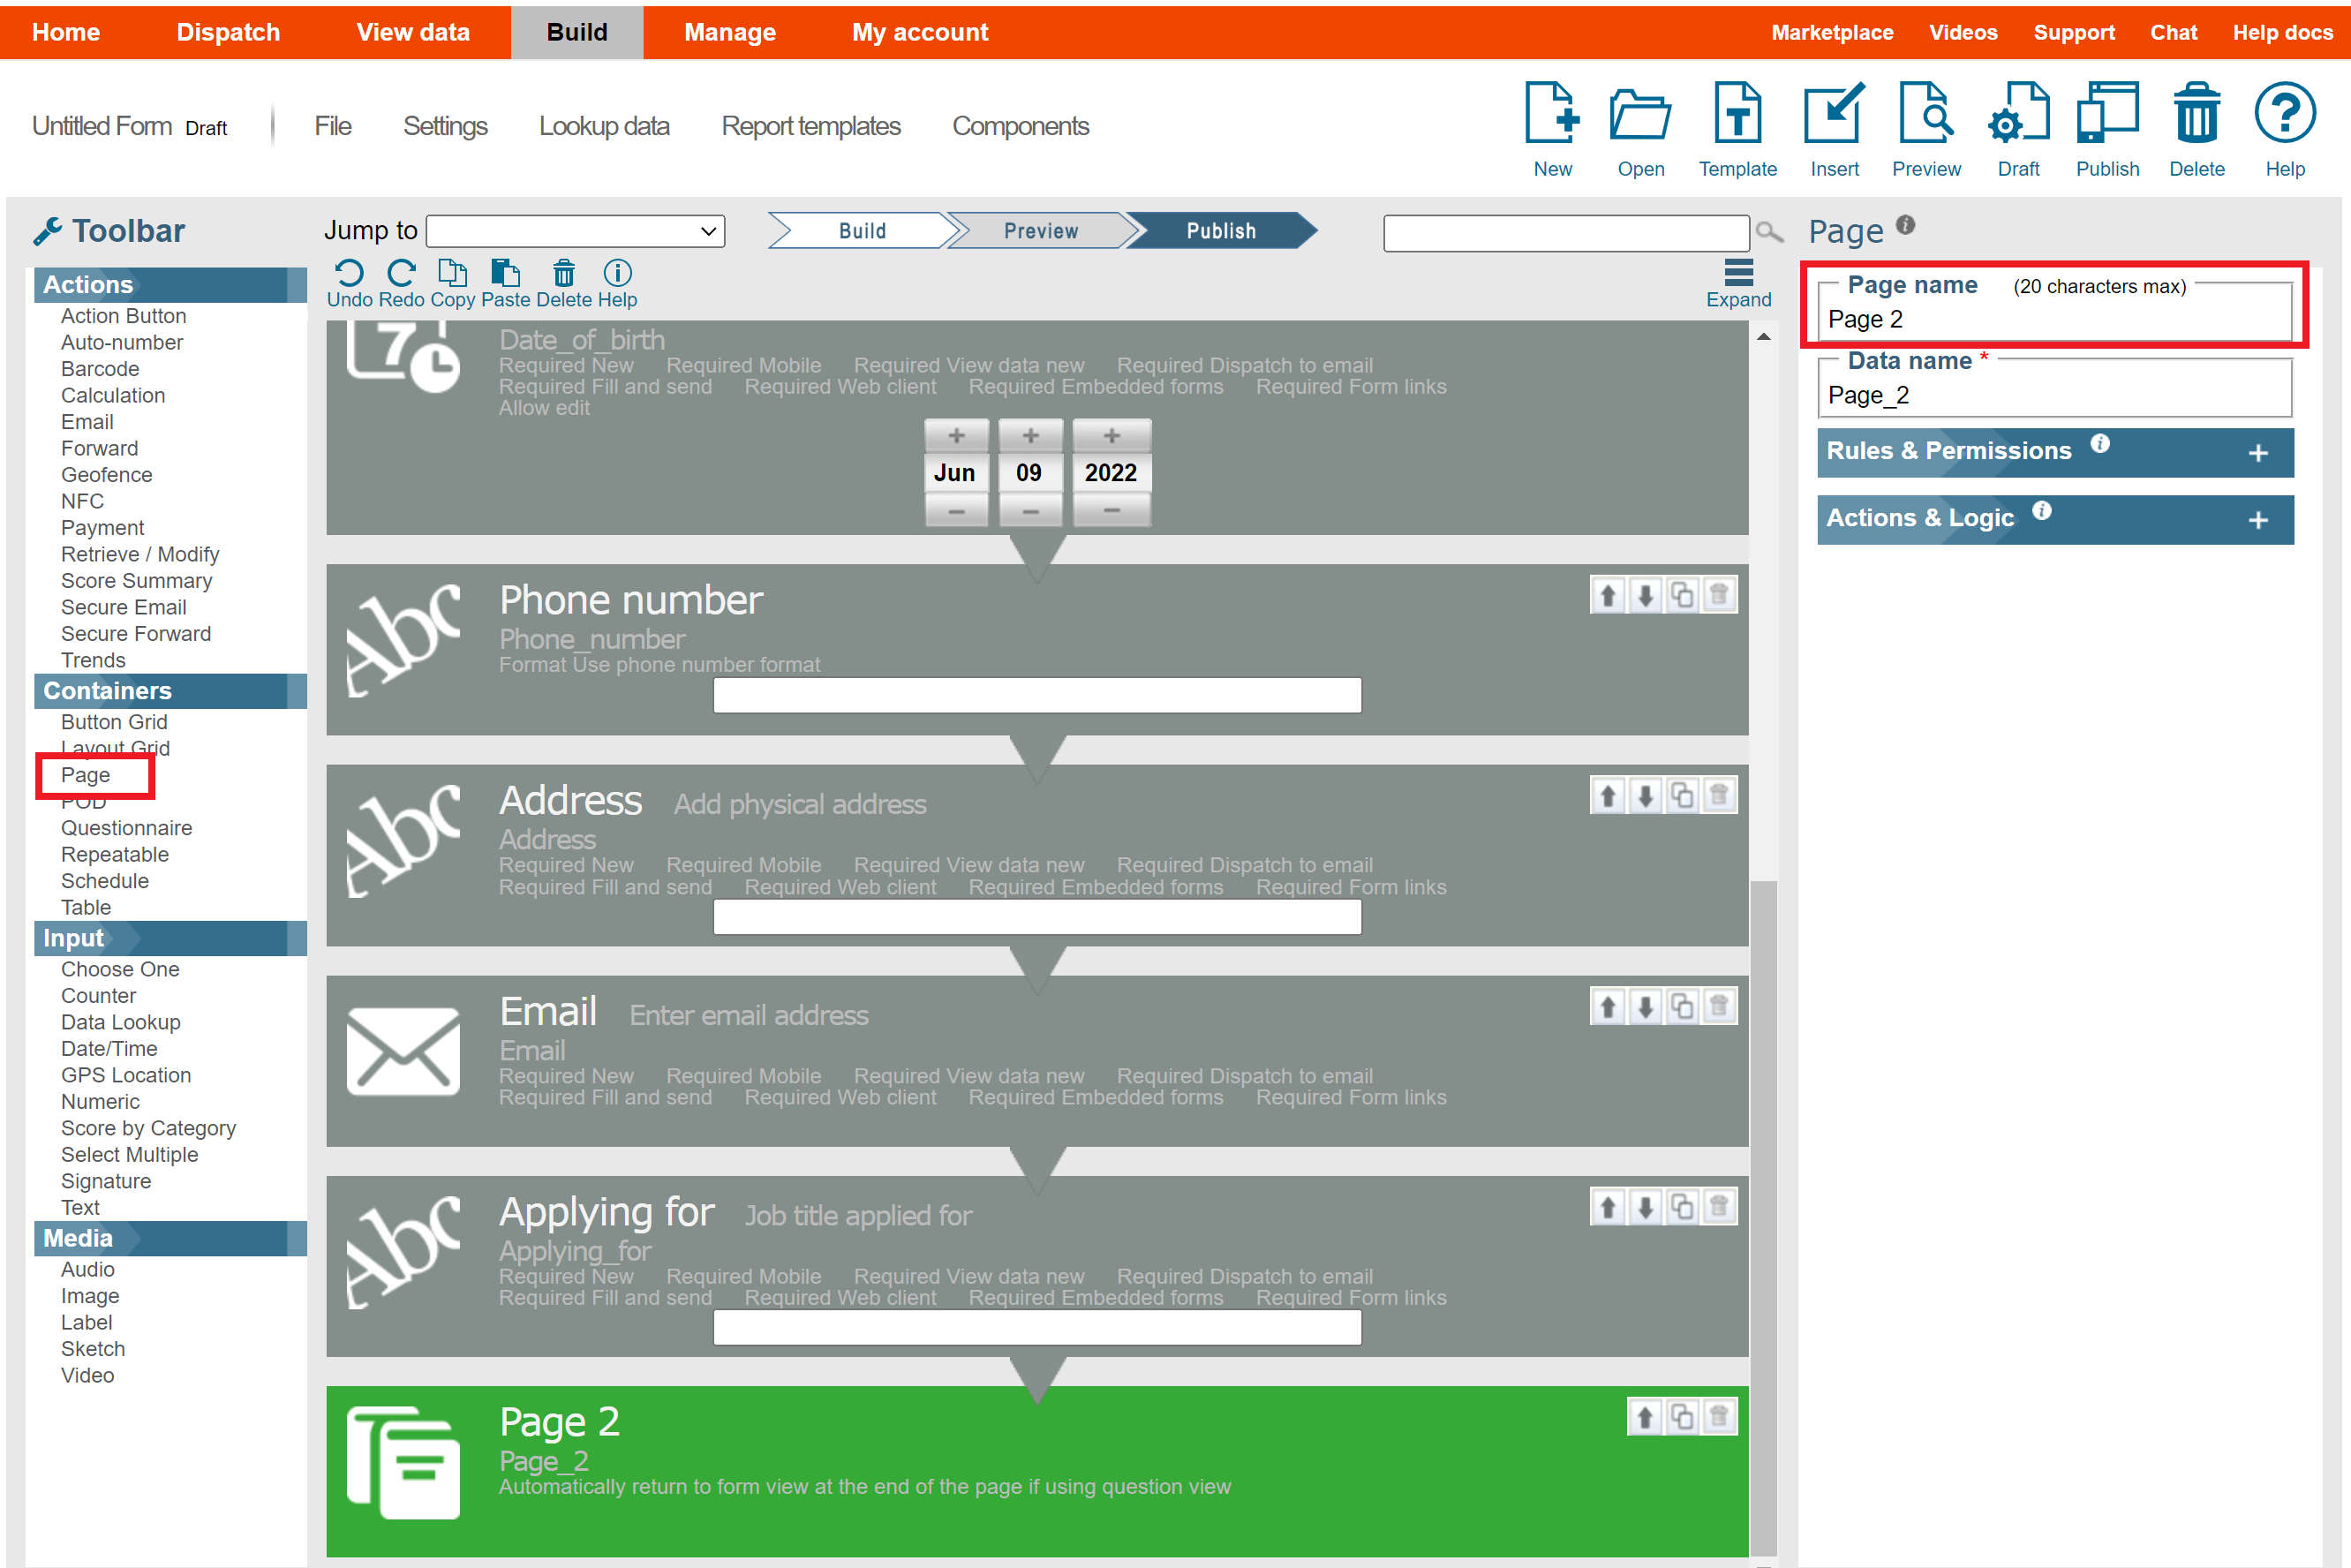
For aesthetic and convenience reasons, especially when using tablets, page breaks can be used to further organize the form:
- Click the Page widget and drag and drop it below the previous question.
- Set your Page name to “Page 2” (or any other descriptive text).
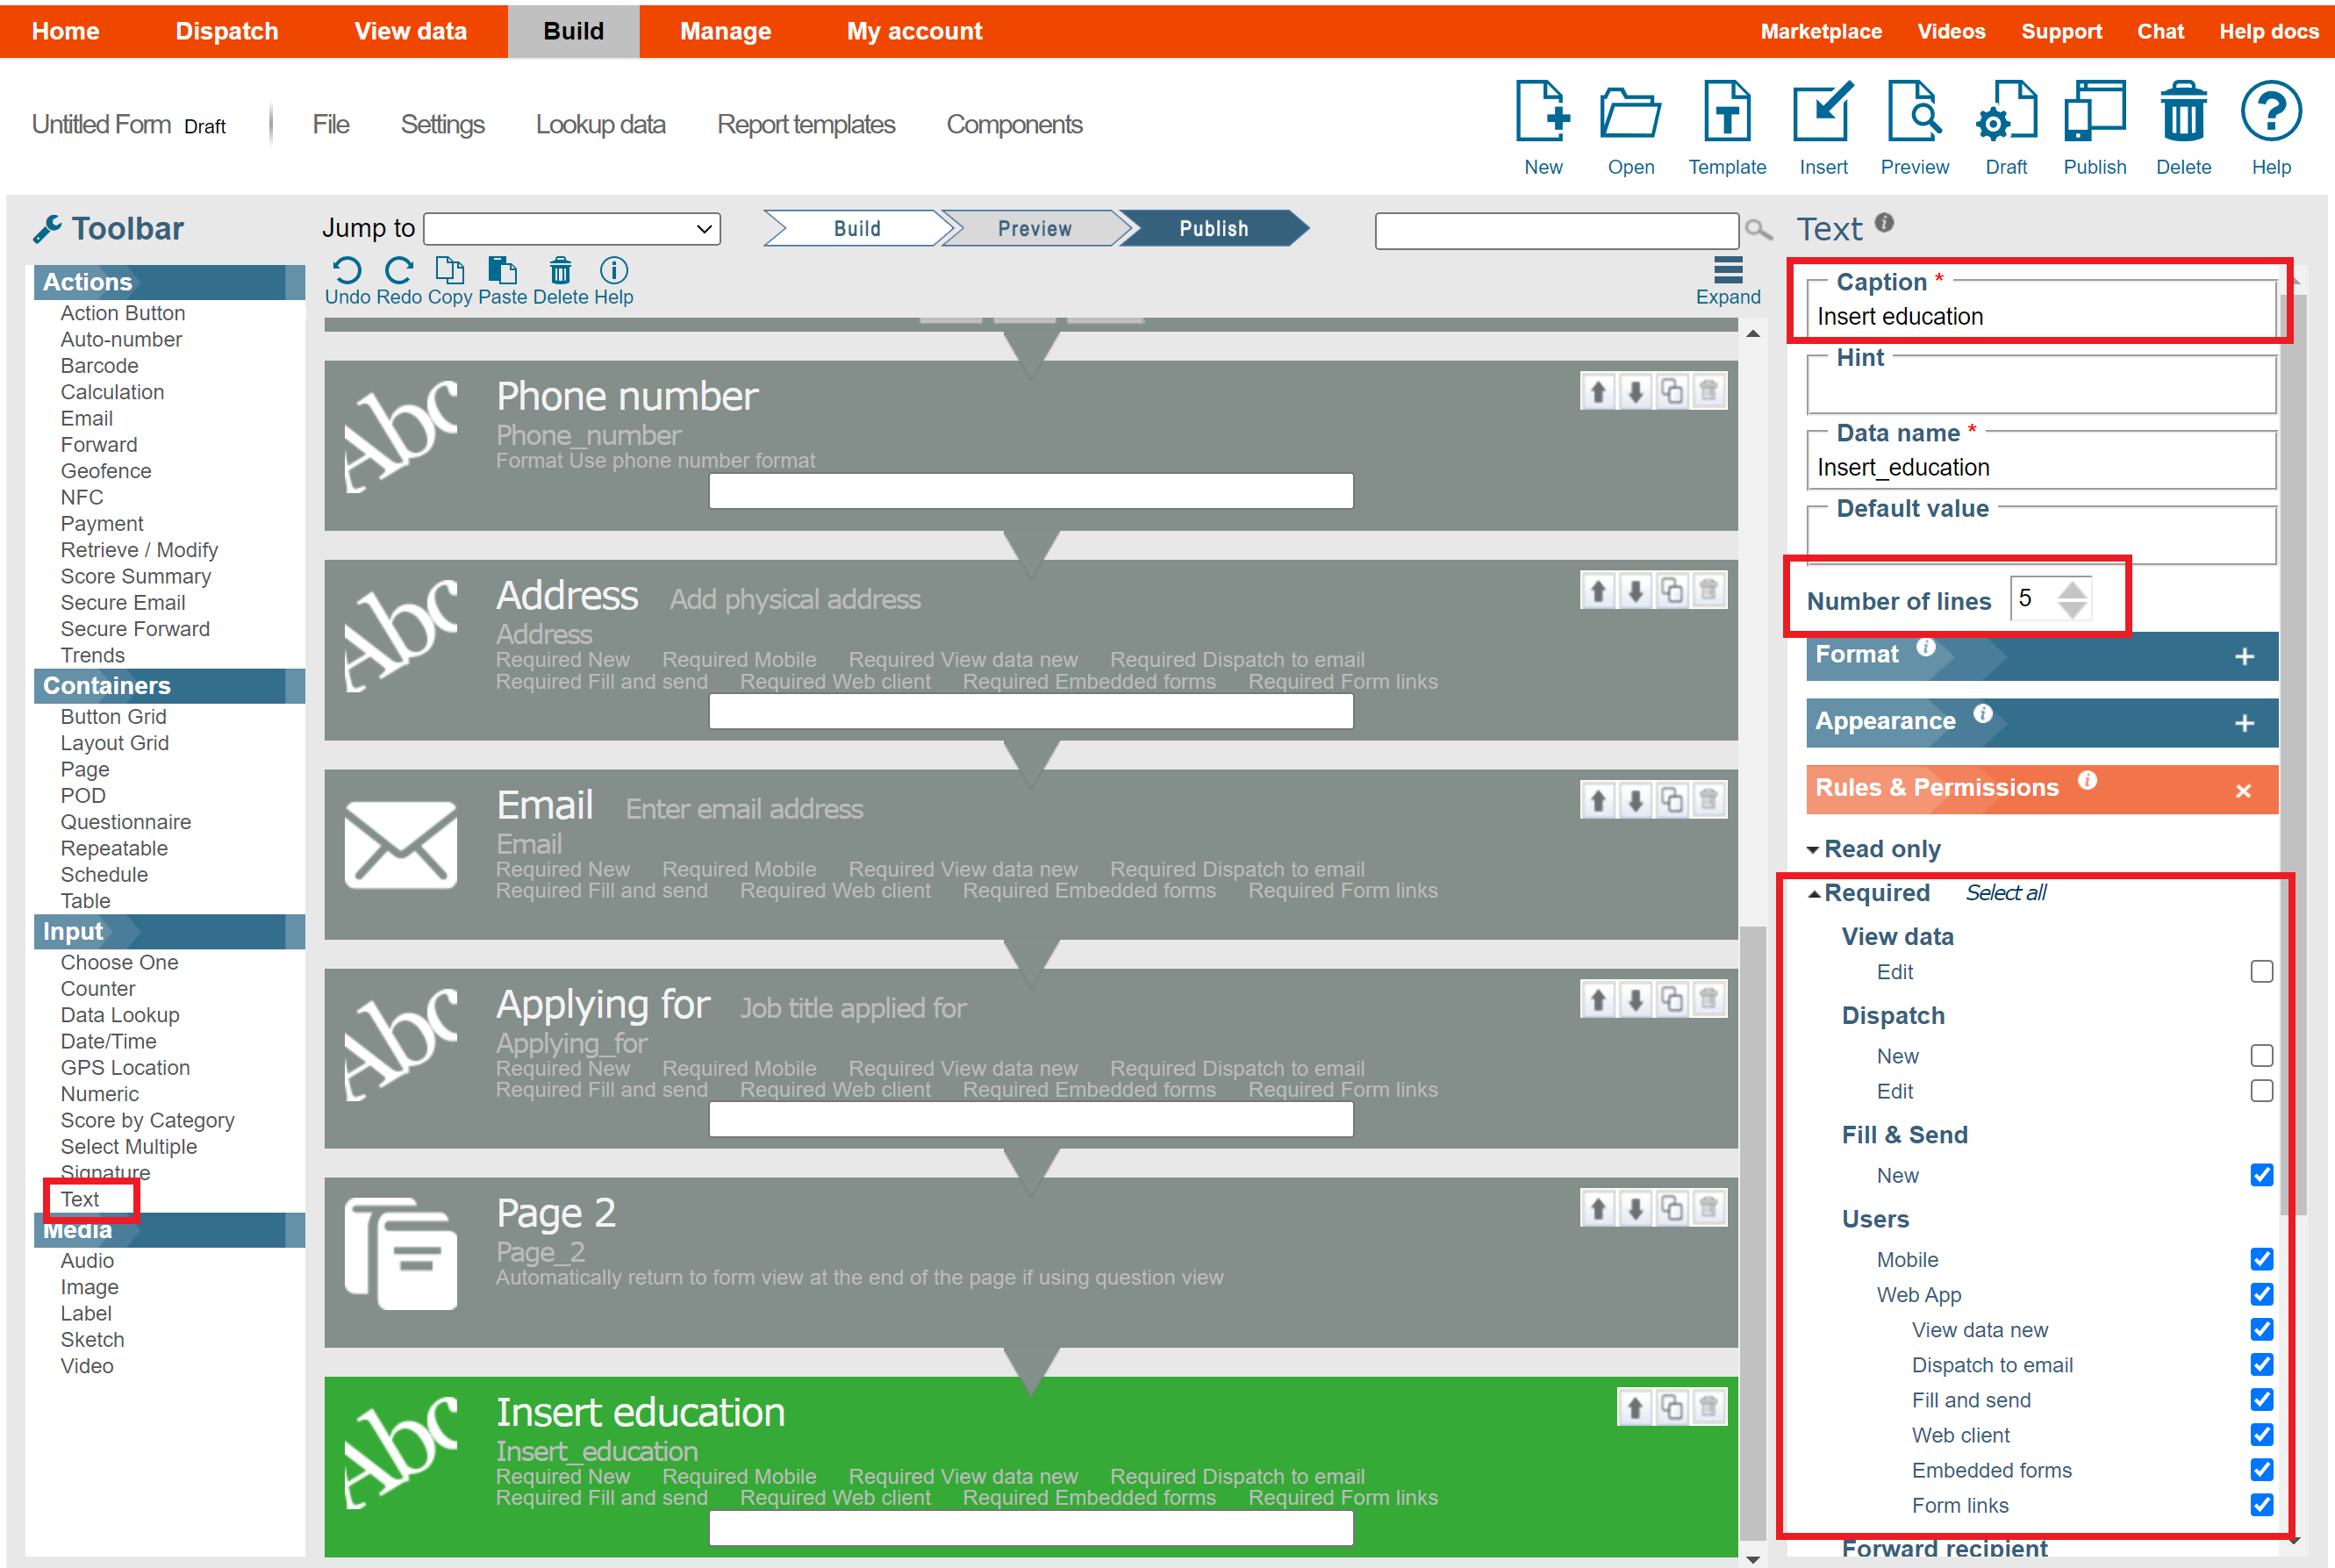
Following this, add another Text widget for entering education information:
- Drag and drop a Text widget below the previous question.
- Name the new section “Insert Education”.
- Change the Number of lines to 5 to allow for multiple lines of information.
- Mark it as Required.
Tip: At this point, it’s a good idea to save your form as Draft. To do this, click on the File menu and select Save Form as Draft. or click the Draft icon in the toolbar. Draft forms are saved in your Build Forms tab but are NOT deployed to your mobile devices.
Next, add a Text widget called “Insert work experience”:
- Drag and drop a Text widget below the previous question.
- Name the new section “Insert Work Experience”.
- Change the Number of lines to 5.
- This time the text isn't marked Required, since the user can be a recent graduate and not possess a working experience.
At this point insert a second page break named "Page 3" using a Page widget.
A new section can cover “PERSONAL SKILLS”:
- Drag and drop a Label widget below the previous question.
- Set the new section’s title to “PERSONAL SKILLS”.
This final section will include question to enter “First language” and “Other languages” with Text widgets, following the examples above:
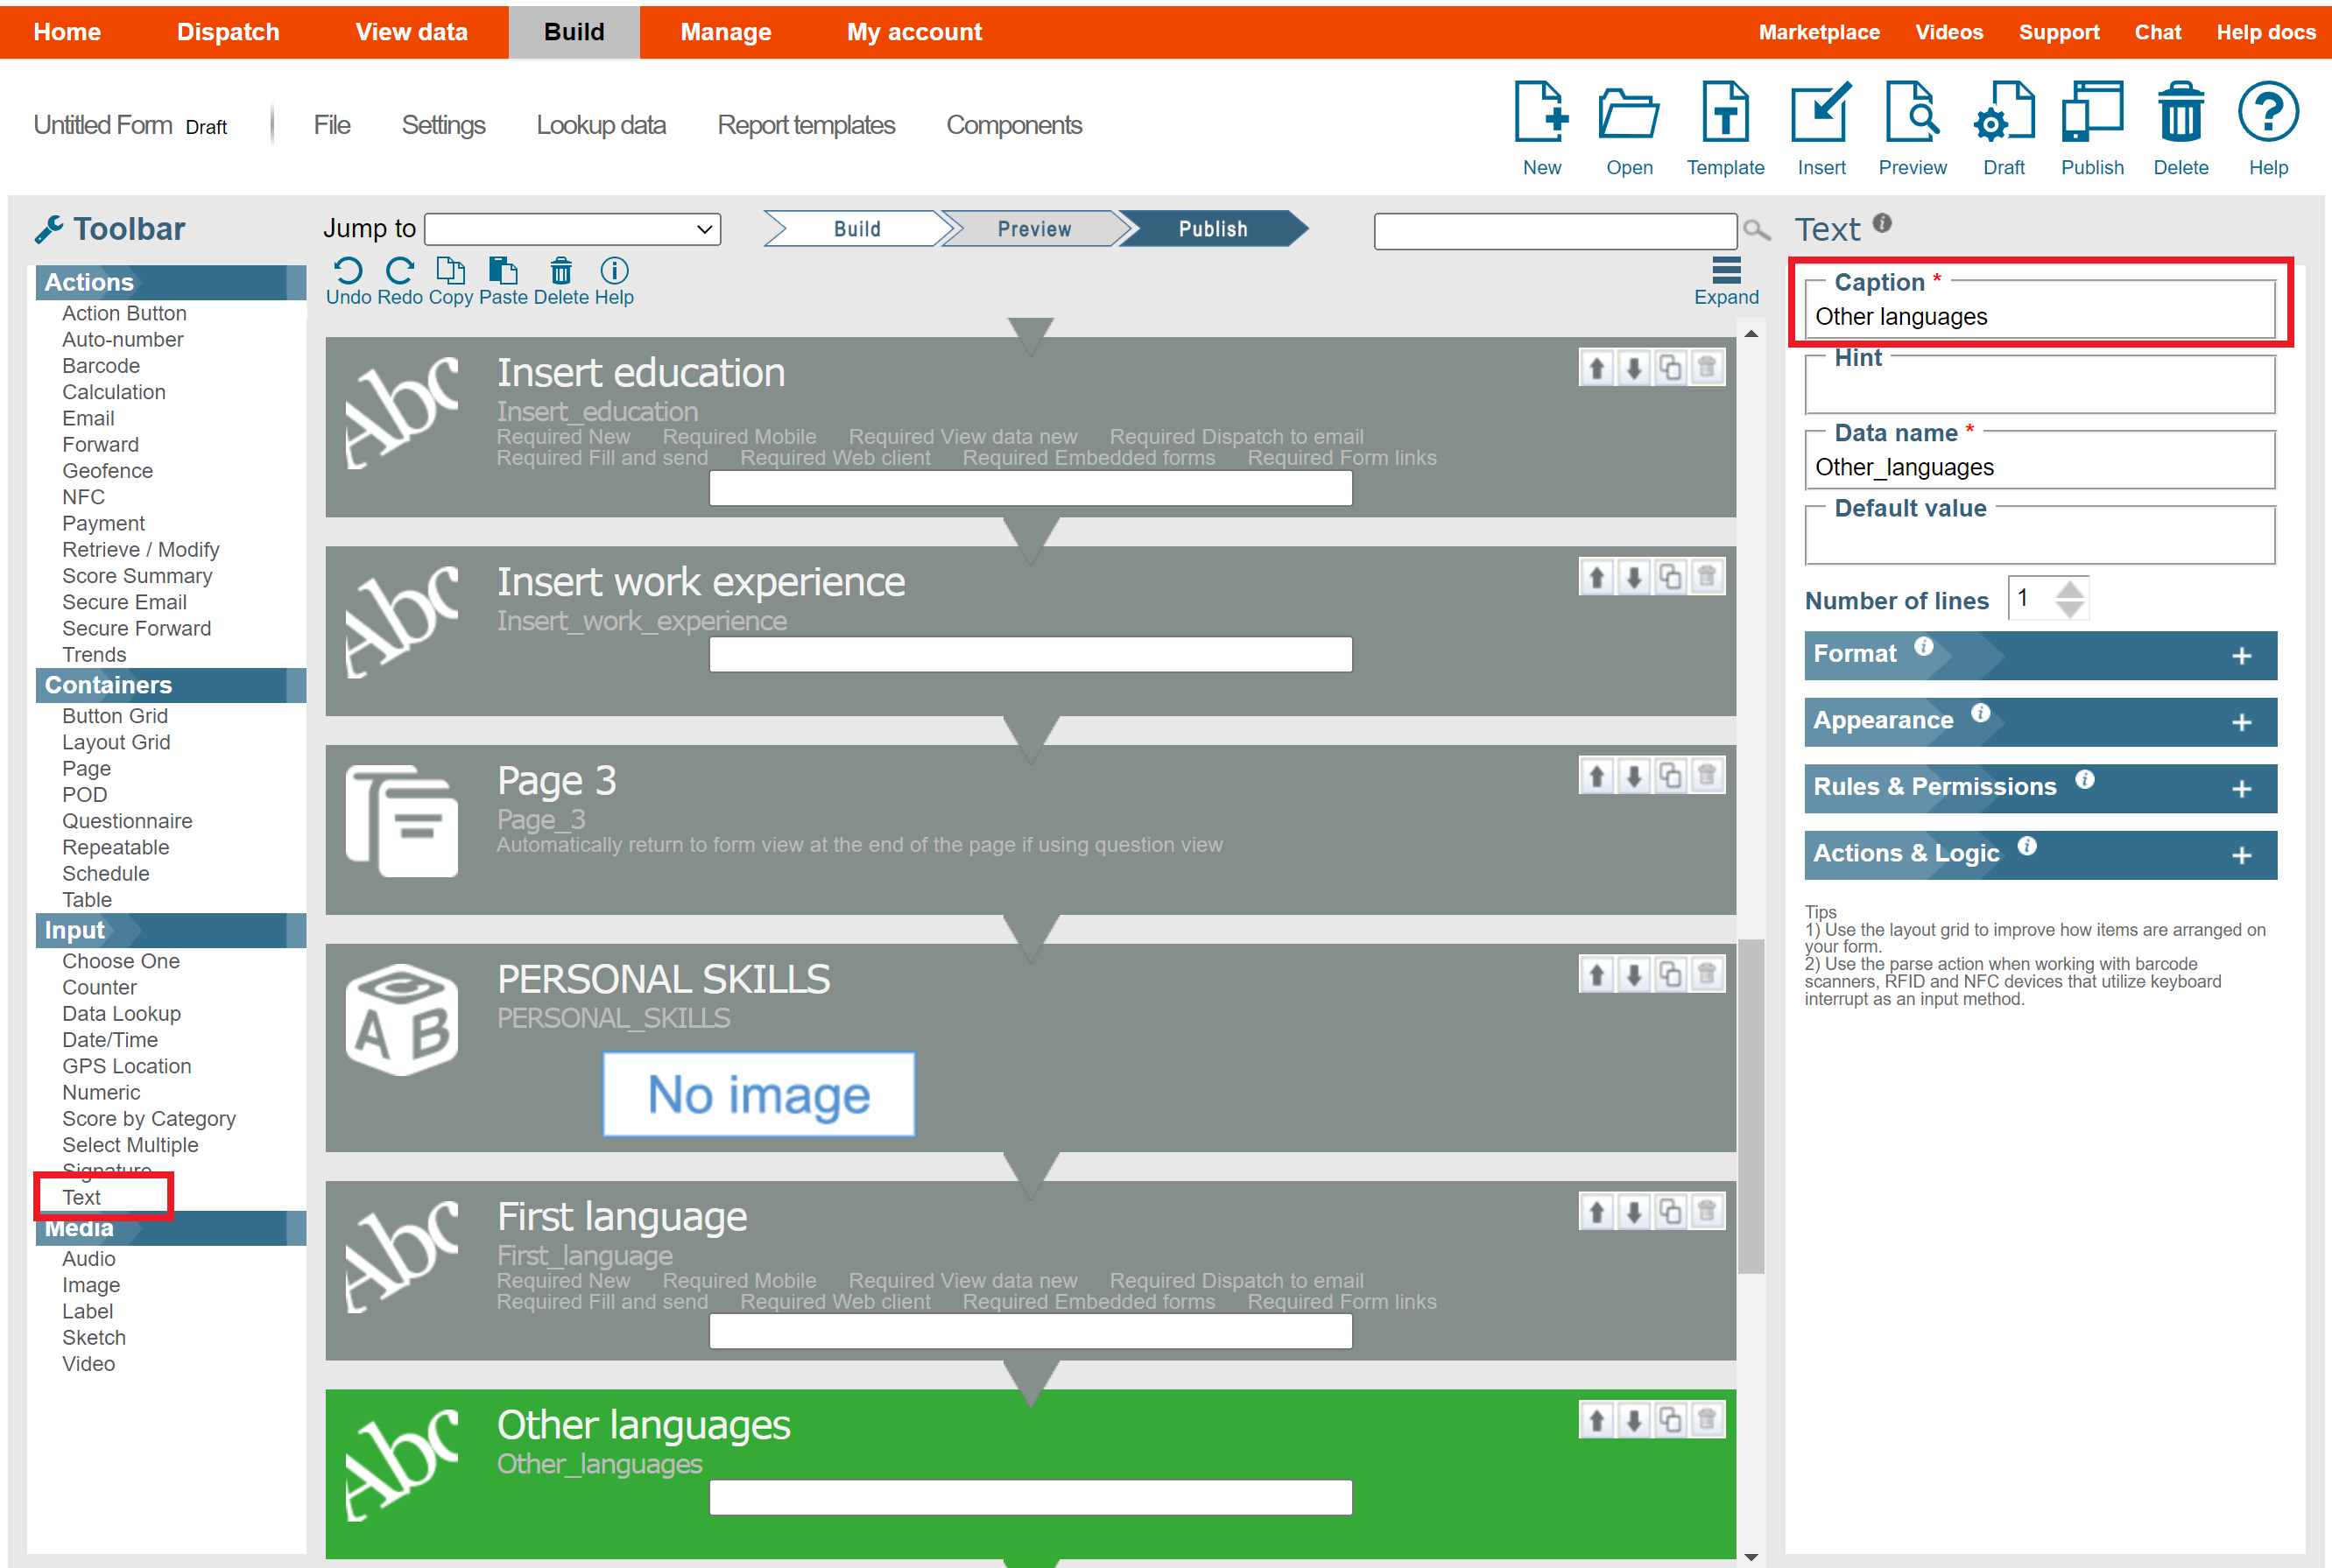
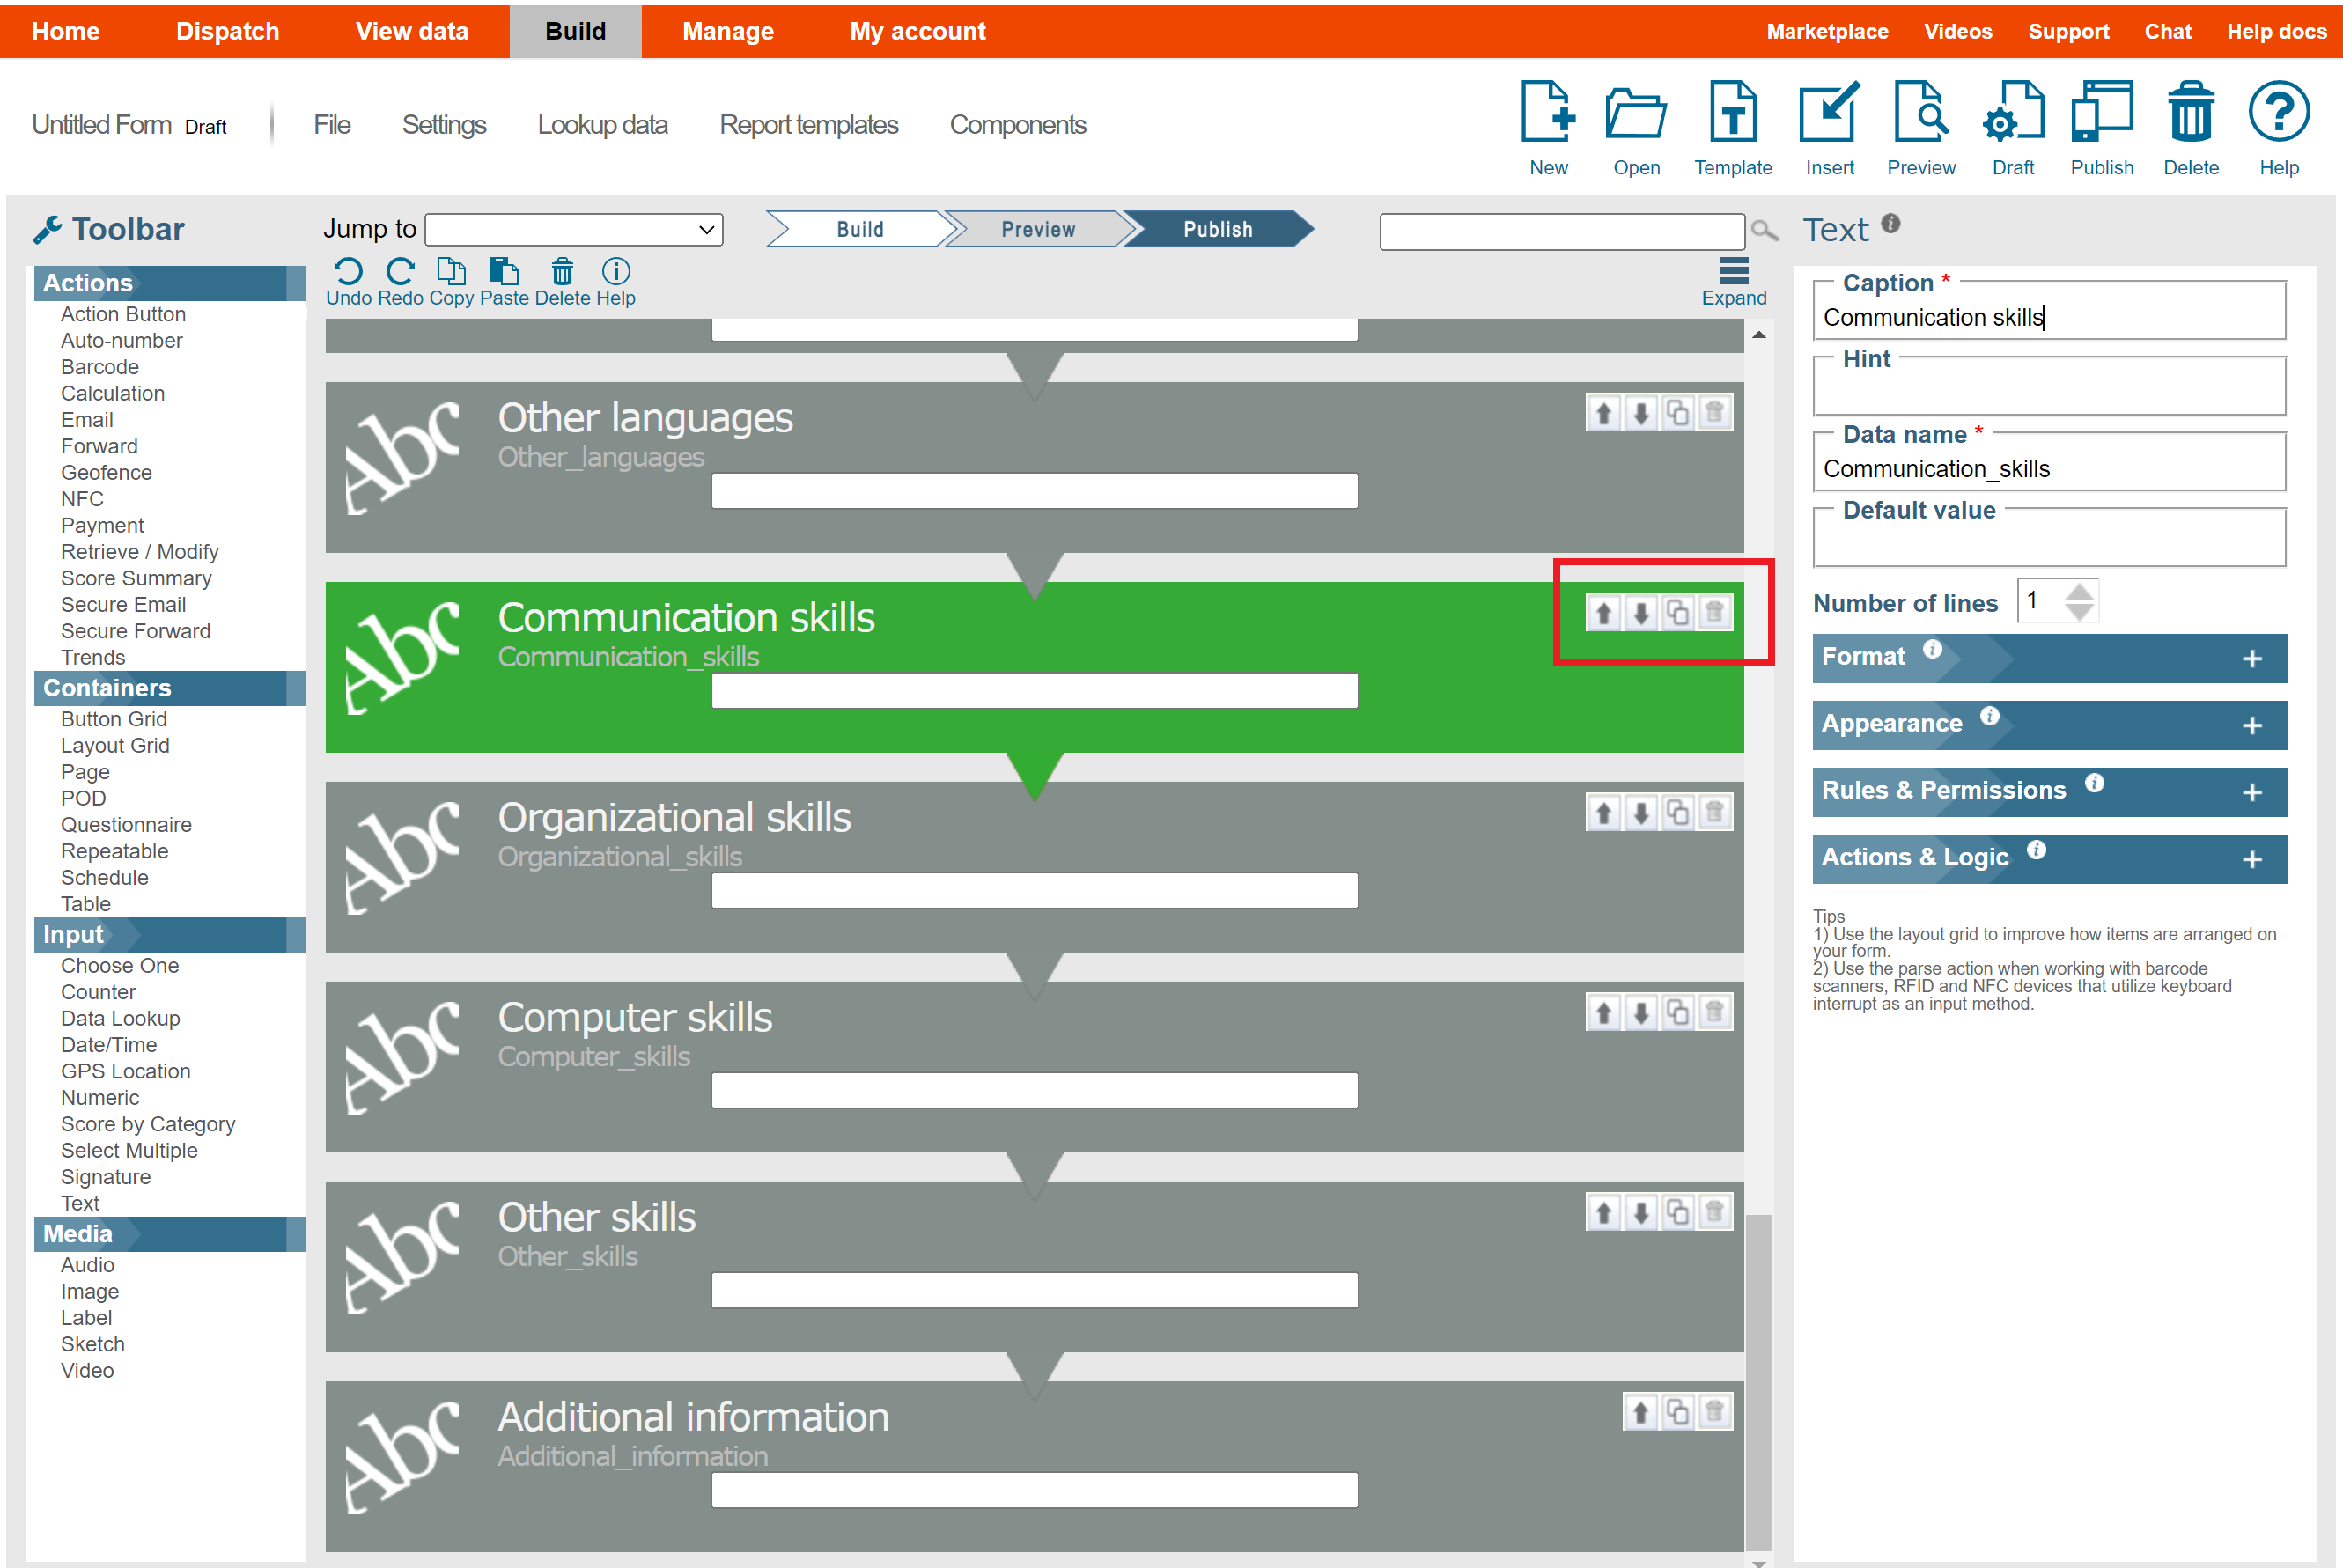
In the same way, add “Communication skills”, “Organizational skills”, “Computer skills”, “Other skills” and “Additional information” (all Text widgets).
Tip: Every widget has in its top right corner the options of moving it up or down (on top or underneath other widgets), to duplicate it (create another question that is the same type as the one you have your cursor on) or to delete it.
Click Preview to preview how the form will look and function:
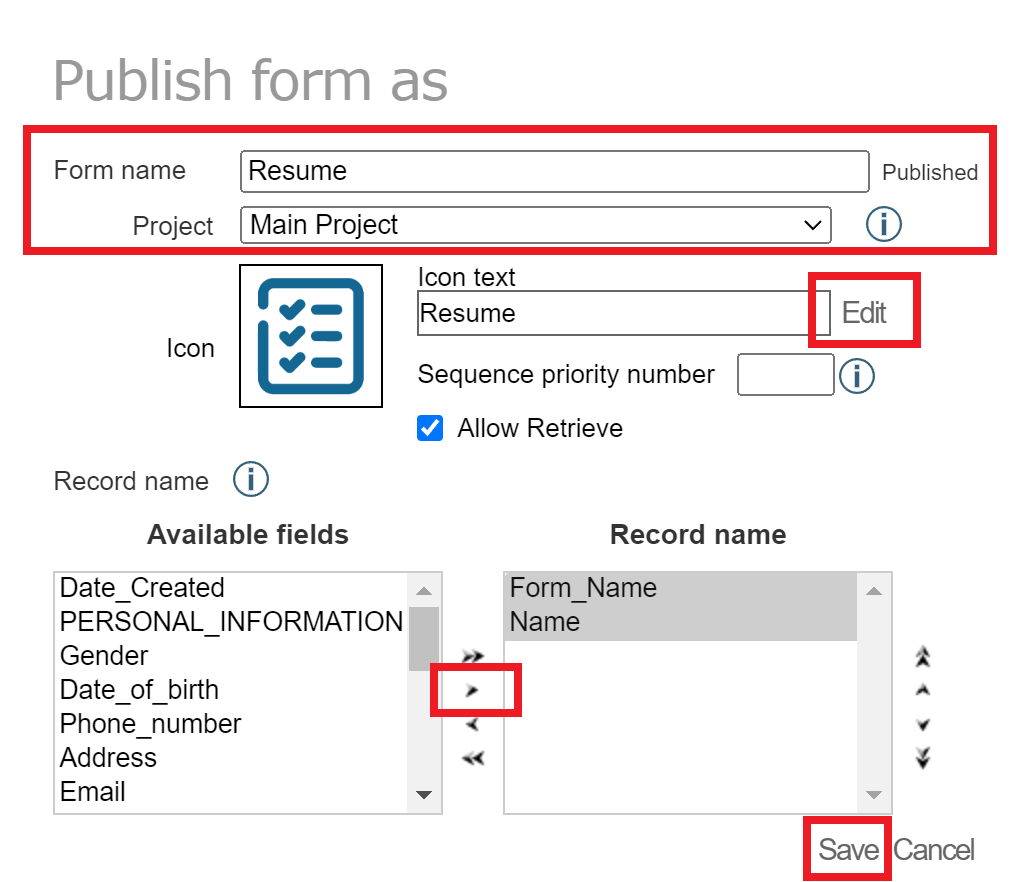
Now that the form has been completed we are ready to publish it to our mobile devices. To do this, go to the File menu and select Save Form As… Published or click the Publish icon.
- Name this form “Resume".
- Assign it to the Main Project.
- Click Edit to change the Icon and the Icon text that will display on a mobile device.
- Add the Form_Name and Name fields to the Record name.
- Click Save to publish the form.
Once published, open the doForms App on your mobile device. Tap Update to get the latest updates, including your new form. Under the Main Menu, go to Forms and then tap on the form you just created.